Front Facing Storage Device
By Alex Shook, Maddy Buxton and Shivani Nookala
Engineering 111, Fall 2016
Abstract
Many people who use crutches are unable to carry things when getting around as they do not always have free hands and oftentimes find bags inaccessible. In order to address the problem, we created a vest with the same carrying capacity as a small handbag or purse. By having all of the pockets on the front and in different sizes, our group was able to create a comfortable and accessible alternative. Through a process of prototyping and user testing, we created a vest that meets all of our initial design specifics.
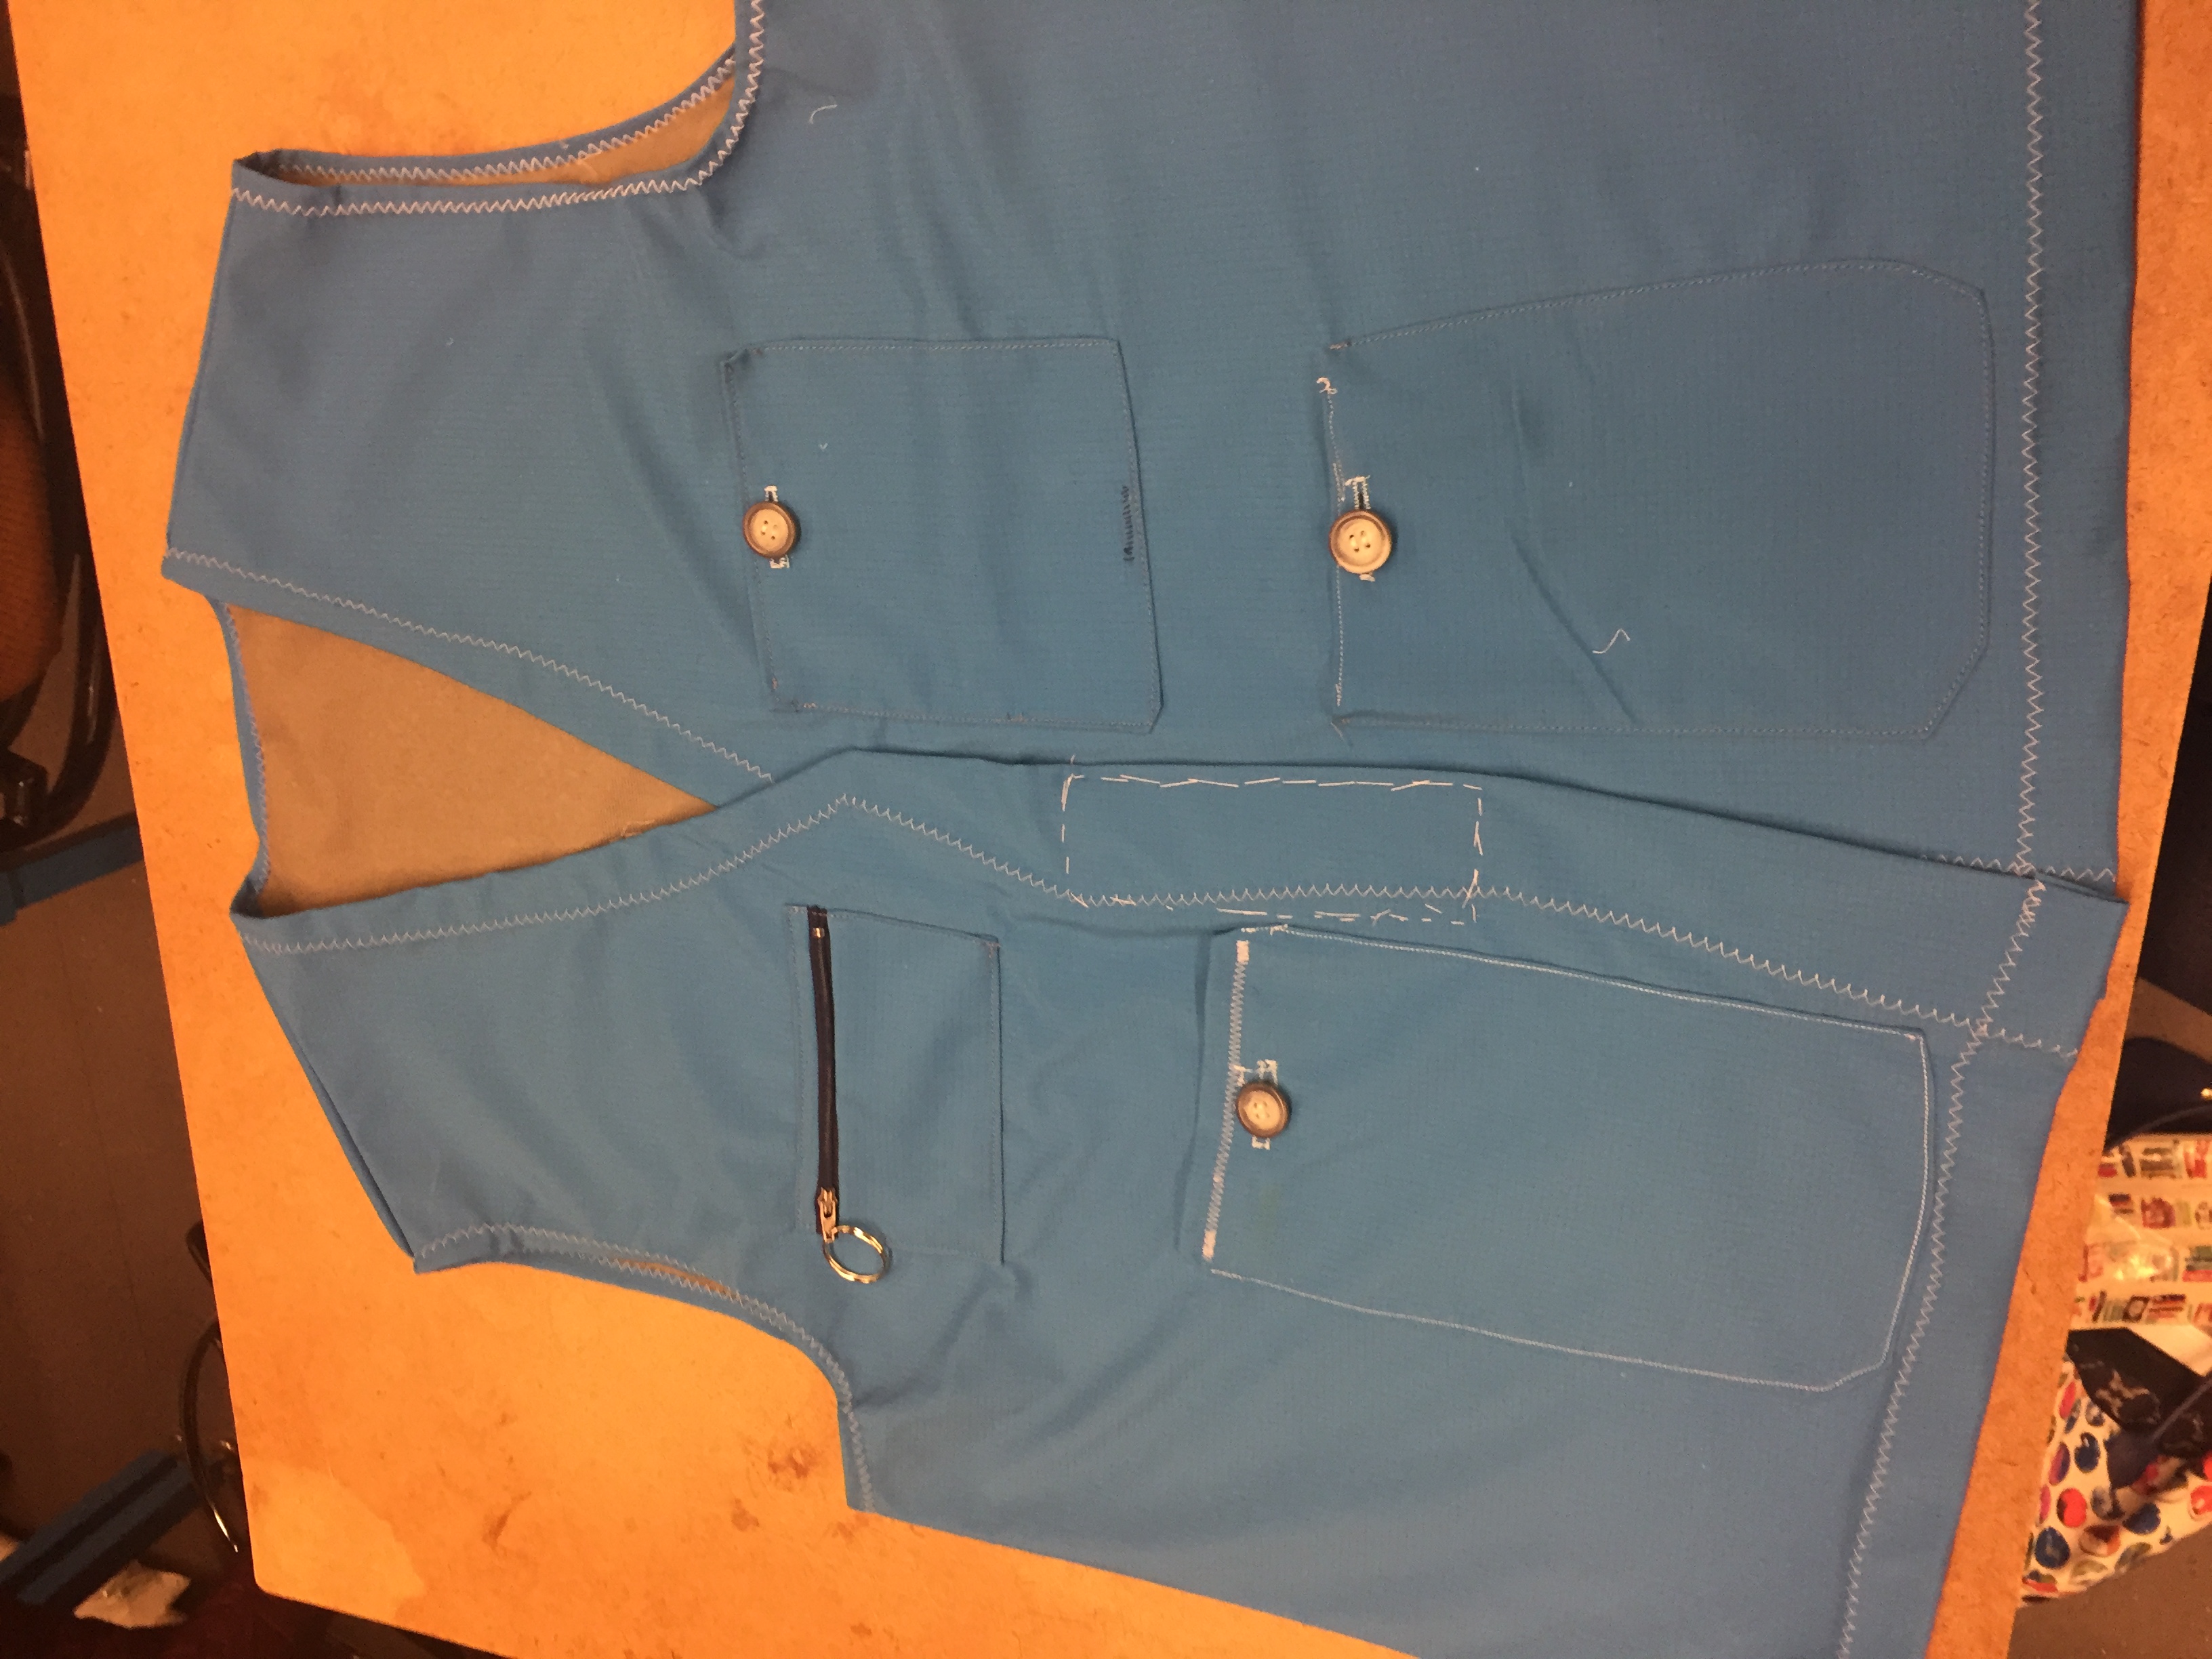
Figure 1: Final Vest Prototype
Introduction
The goal of our project is to assist people who use crutches in carrying day to day items. We wanted to create something that could hold basic necessities like keys and a phone. People who use crutches are not able to carry things in their hands while they are walking. In order to reach something fast and efficiently, they need a product that can be carried on the front of their body. We worked with Priscilla, a woman who uses crutches and wants some place for easy access to her belongings on the go while still being fashionable.
We created a vest with four pockets. The vest closes in the front with a single strip of velcro so that it can be opened and closed quickly. Each of the pockets is a different size so that it can be used for different items. The biggest pocket has the potential to hold a 750ml water bottle. The two next biggest pockets are designed to hold a phone, wallet, or notebook. These three pockets close with buttons. The buttons are able to be opened and closed with one hand quickly. The fourth pocket is small and closes with a zipper. This pocket is designed for small valuables such as credit cards or cash. The zipper has a key ring to aid in opening and closing. The entire vest is made of non-stretch, athletic material.
Design Concepts
When originally considering the problem, we decided to use brainstorming to think of different approaches. Once we determined that the main components needed were strap designs, storage ideas, and enclosures, we switched our method to three unique brainstorms for the above components.
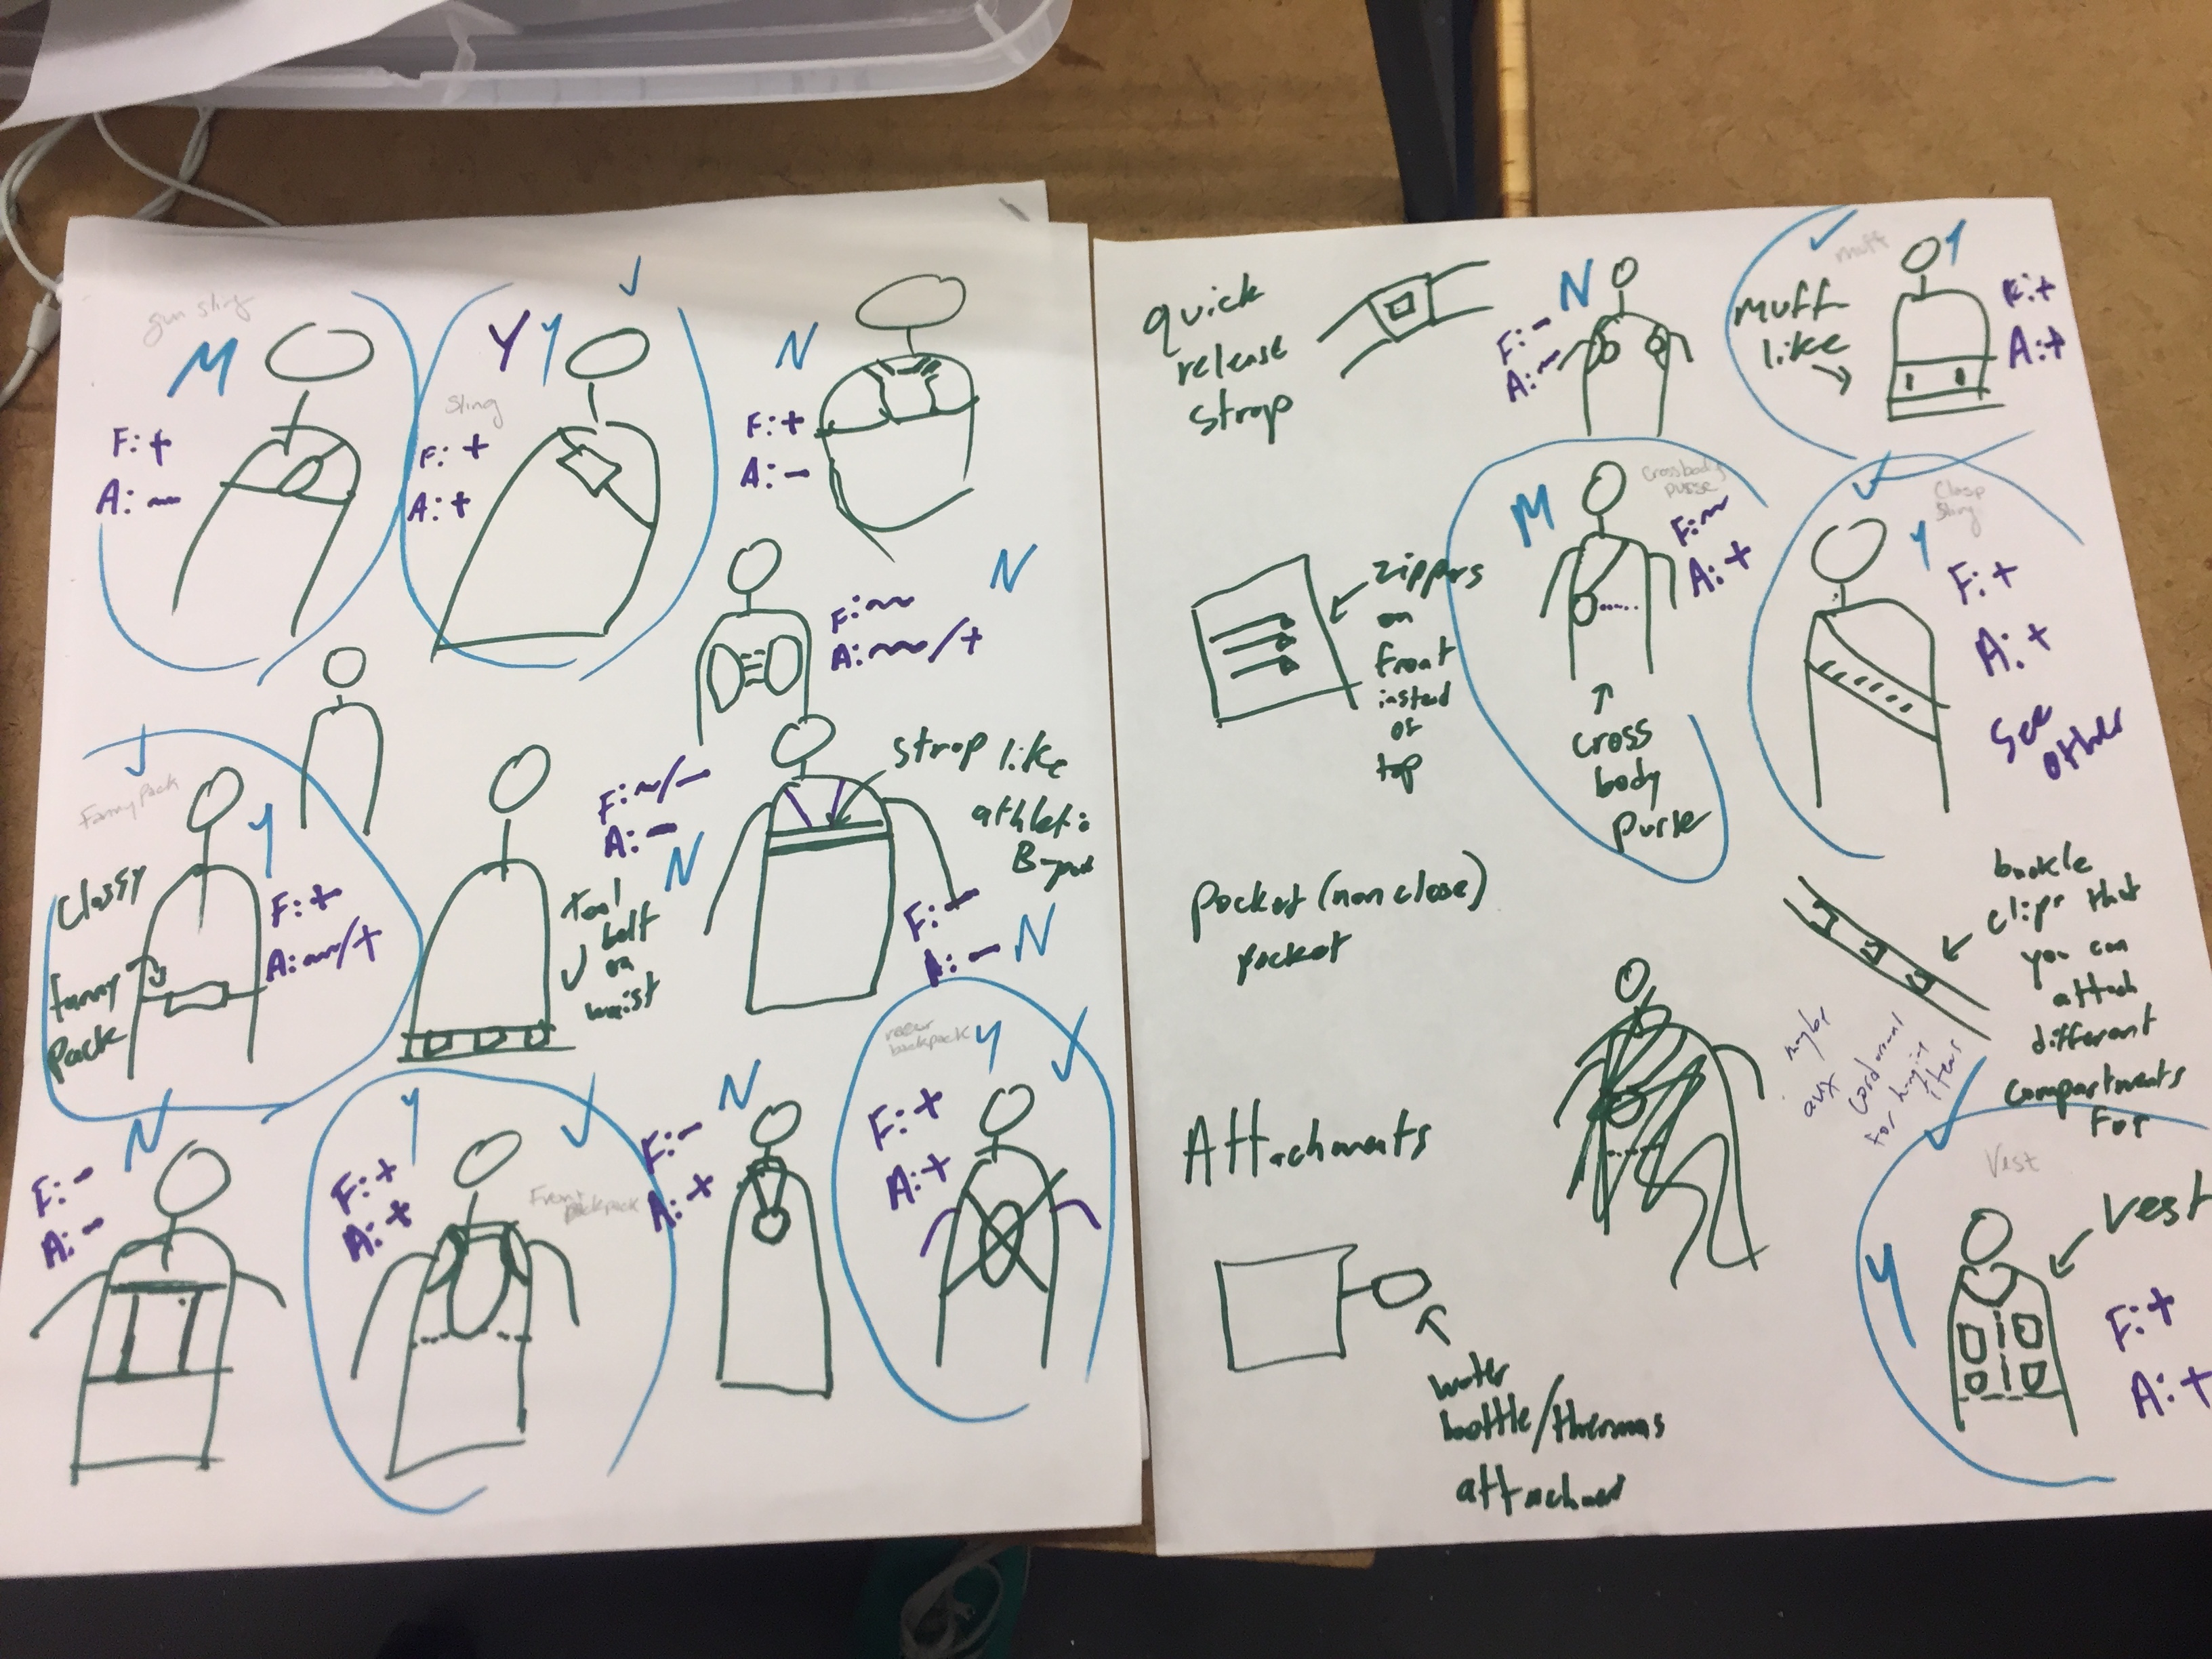
Figure 2: The Initial Brainstorm Session to Determine Type and Shape of Design
We eventually settled on three designs that incorporated different aspects of the brainstorms. Our first was a sling bag that sat on the chest of the wearer and had an additional buckle for a water bottle addition. The next was a front-facing “backpack” with two different strap options for the back: racerback and traditional straps. The third, and ultimately final design was a vest with large pockets.
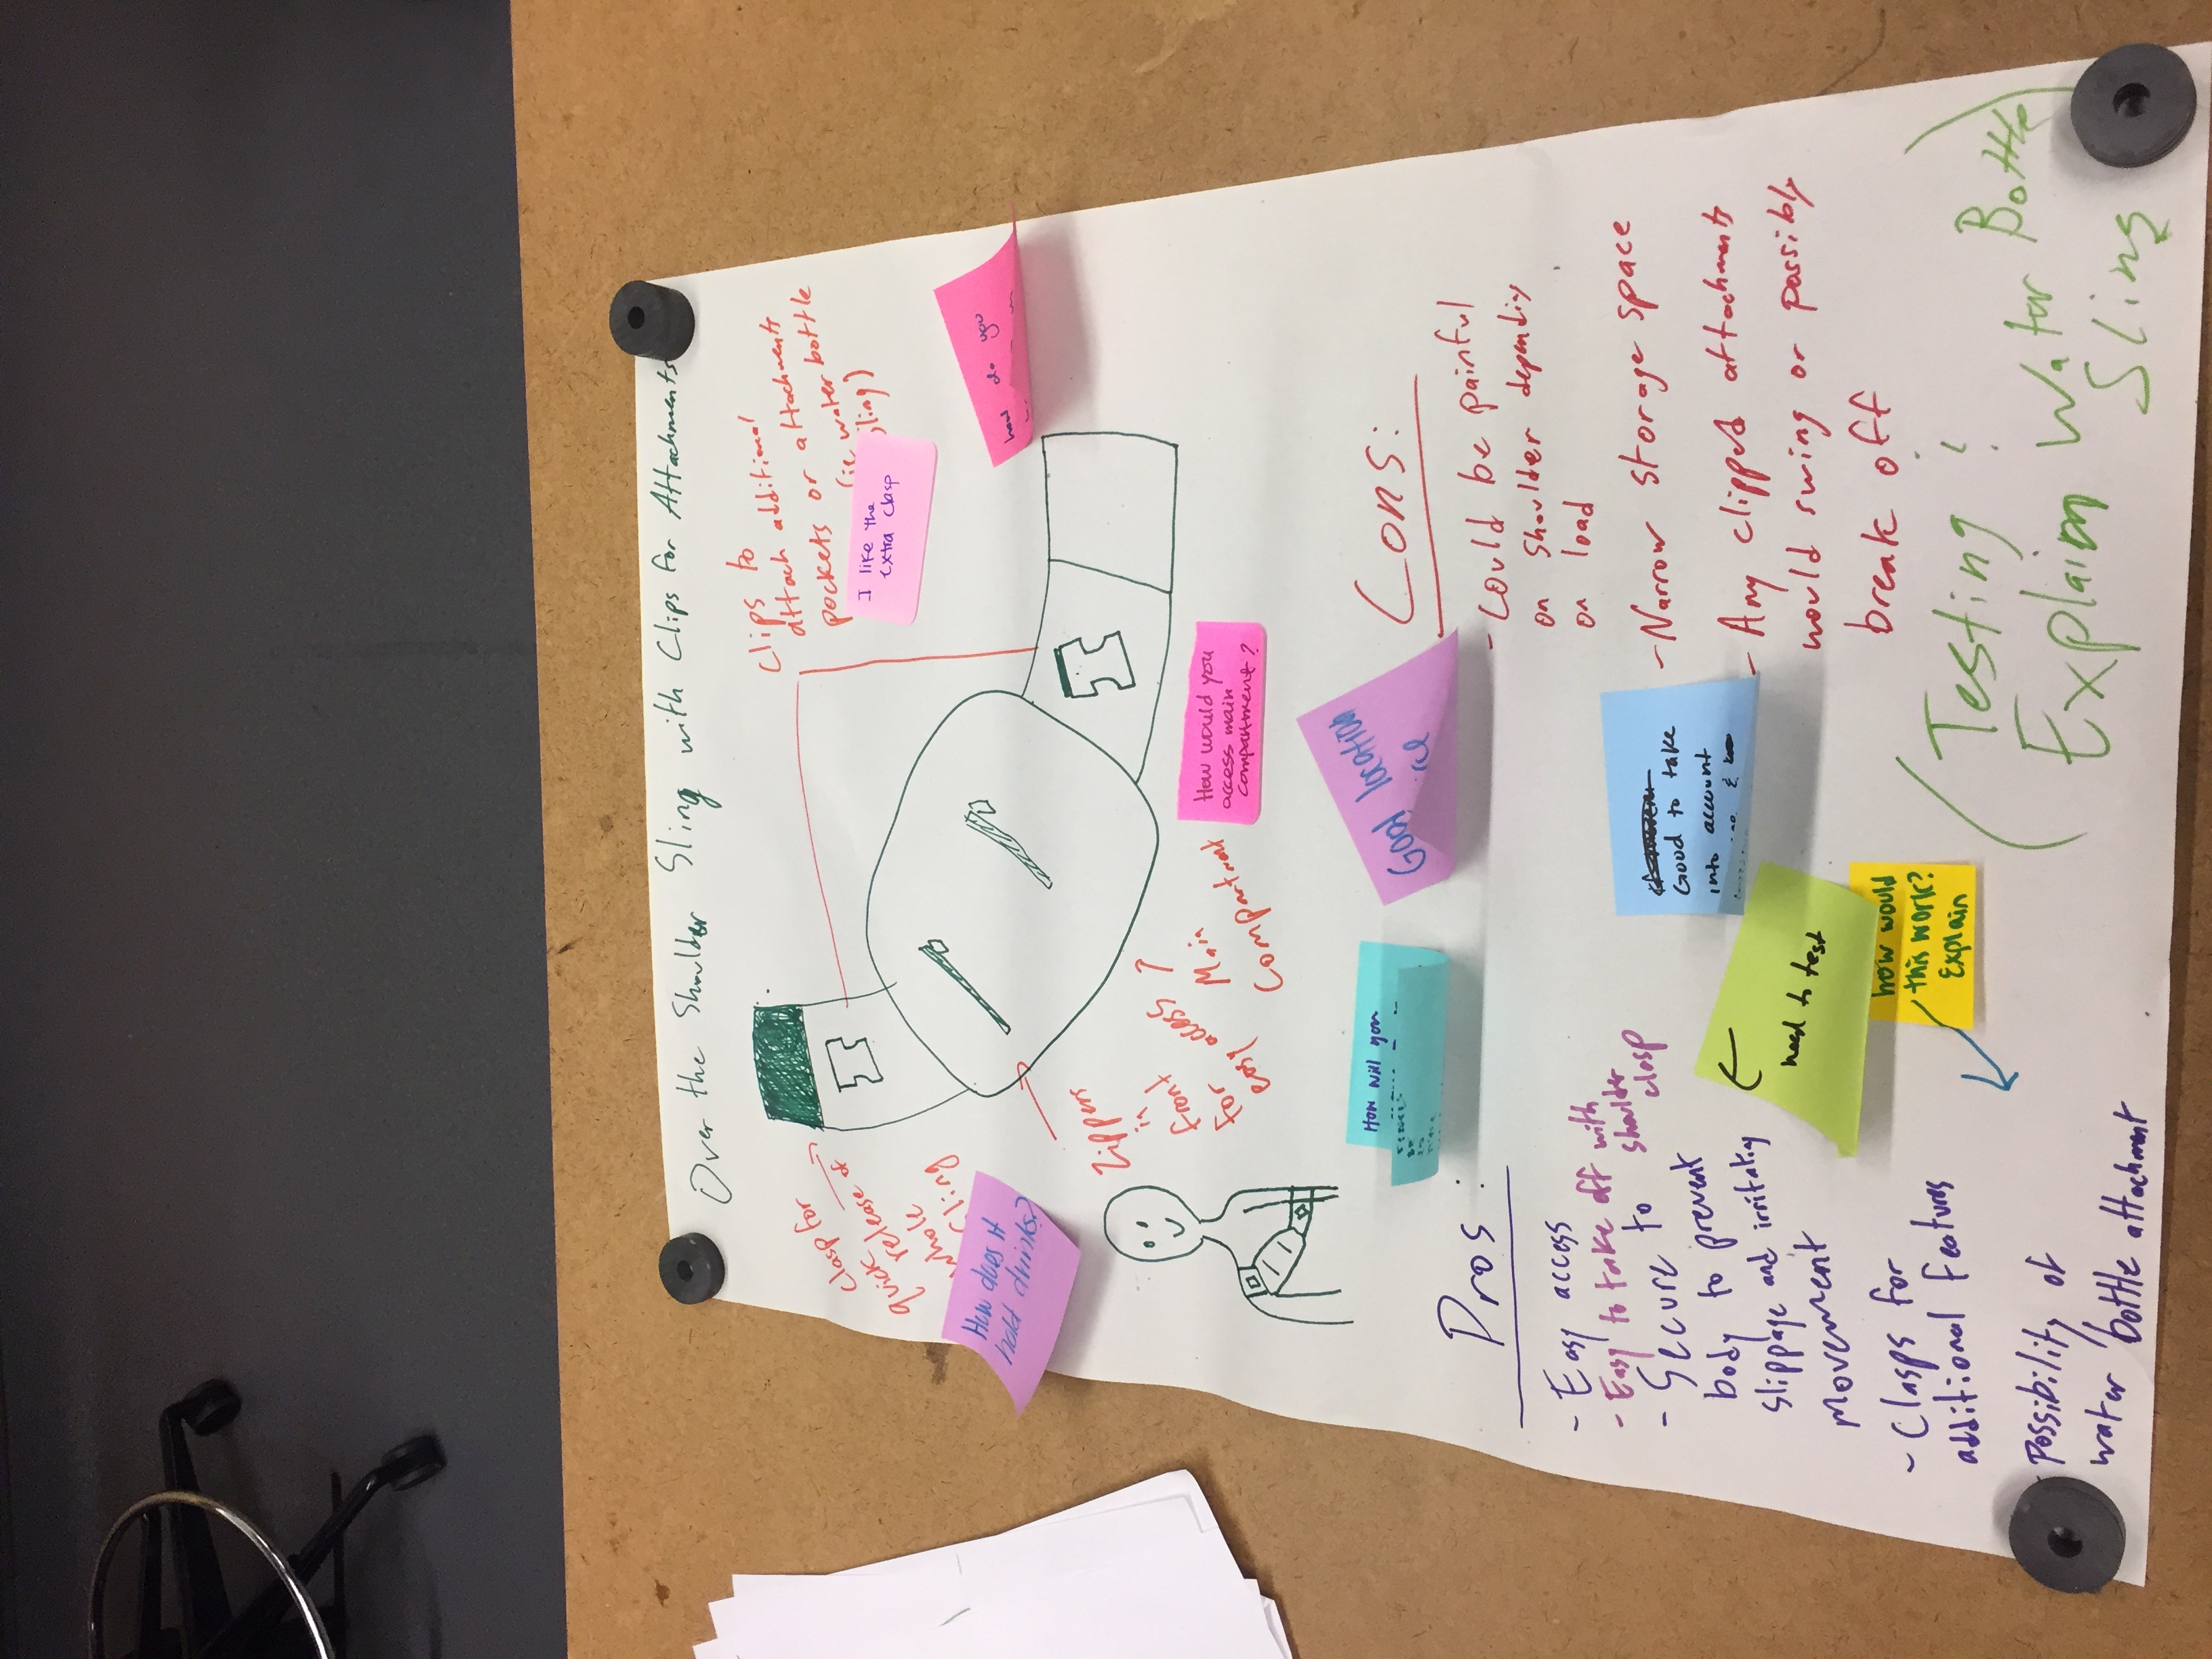

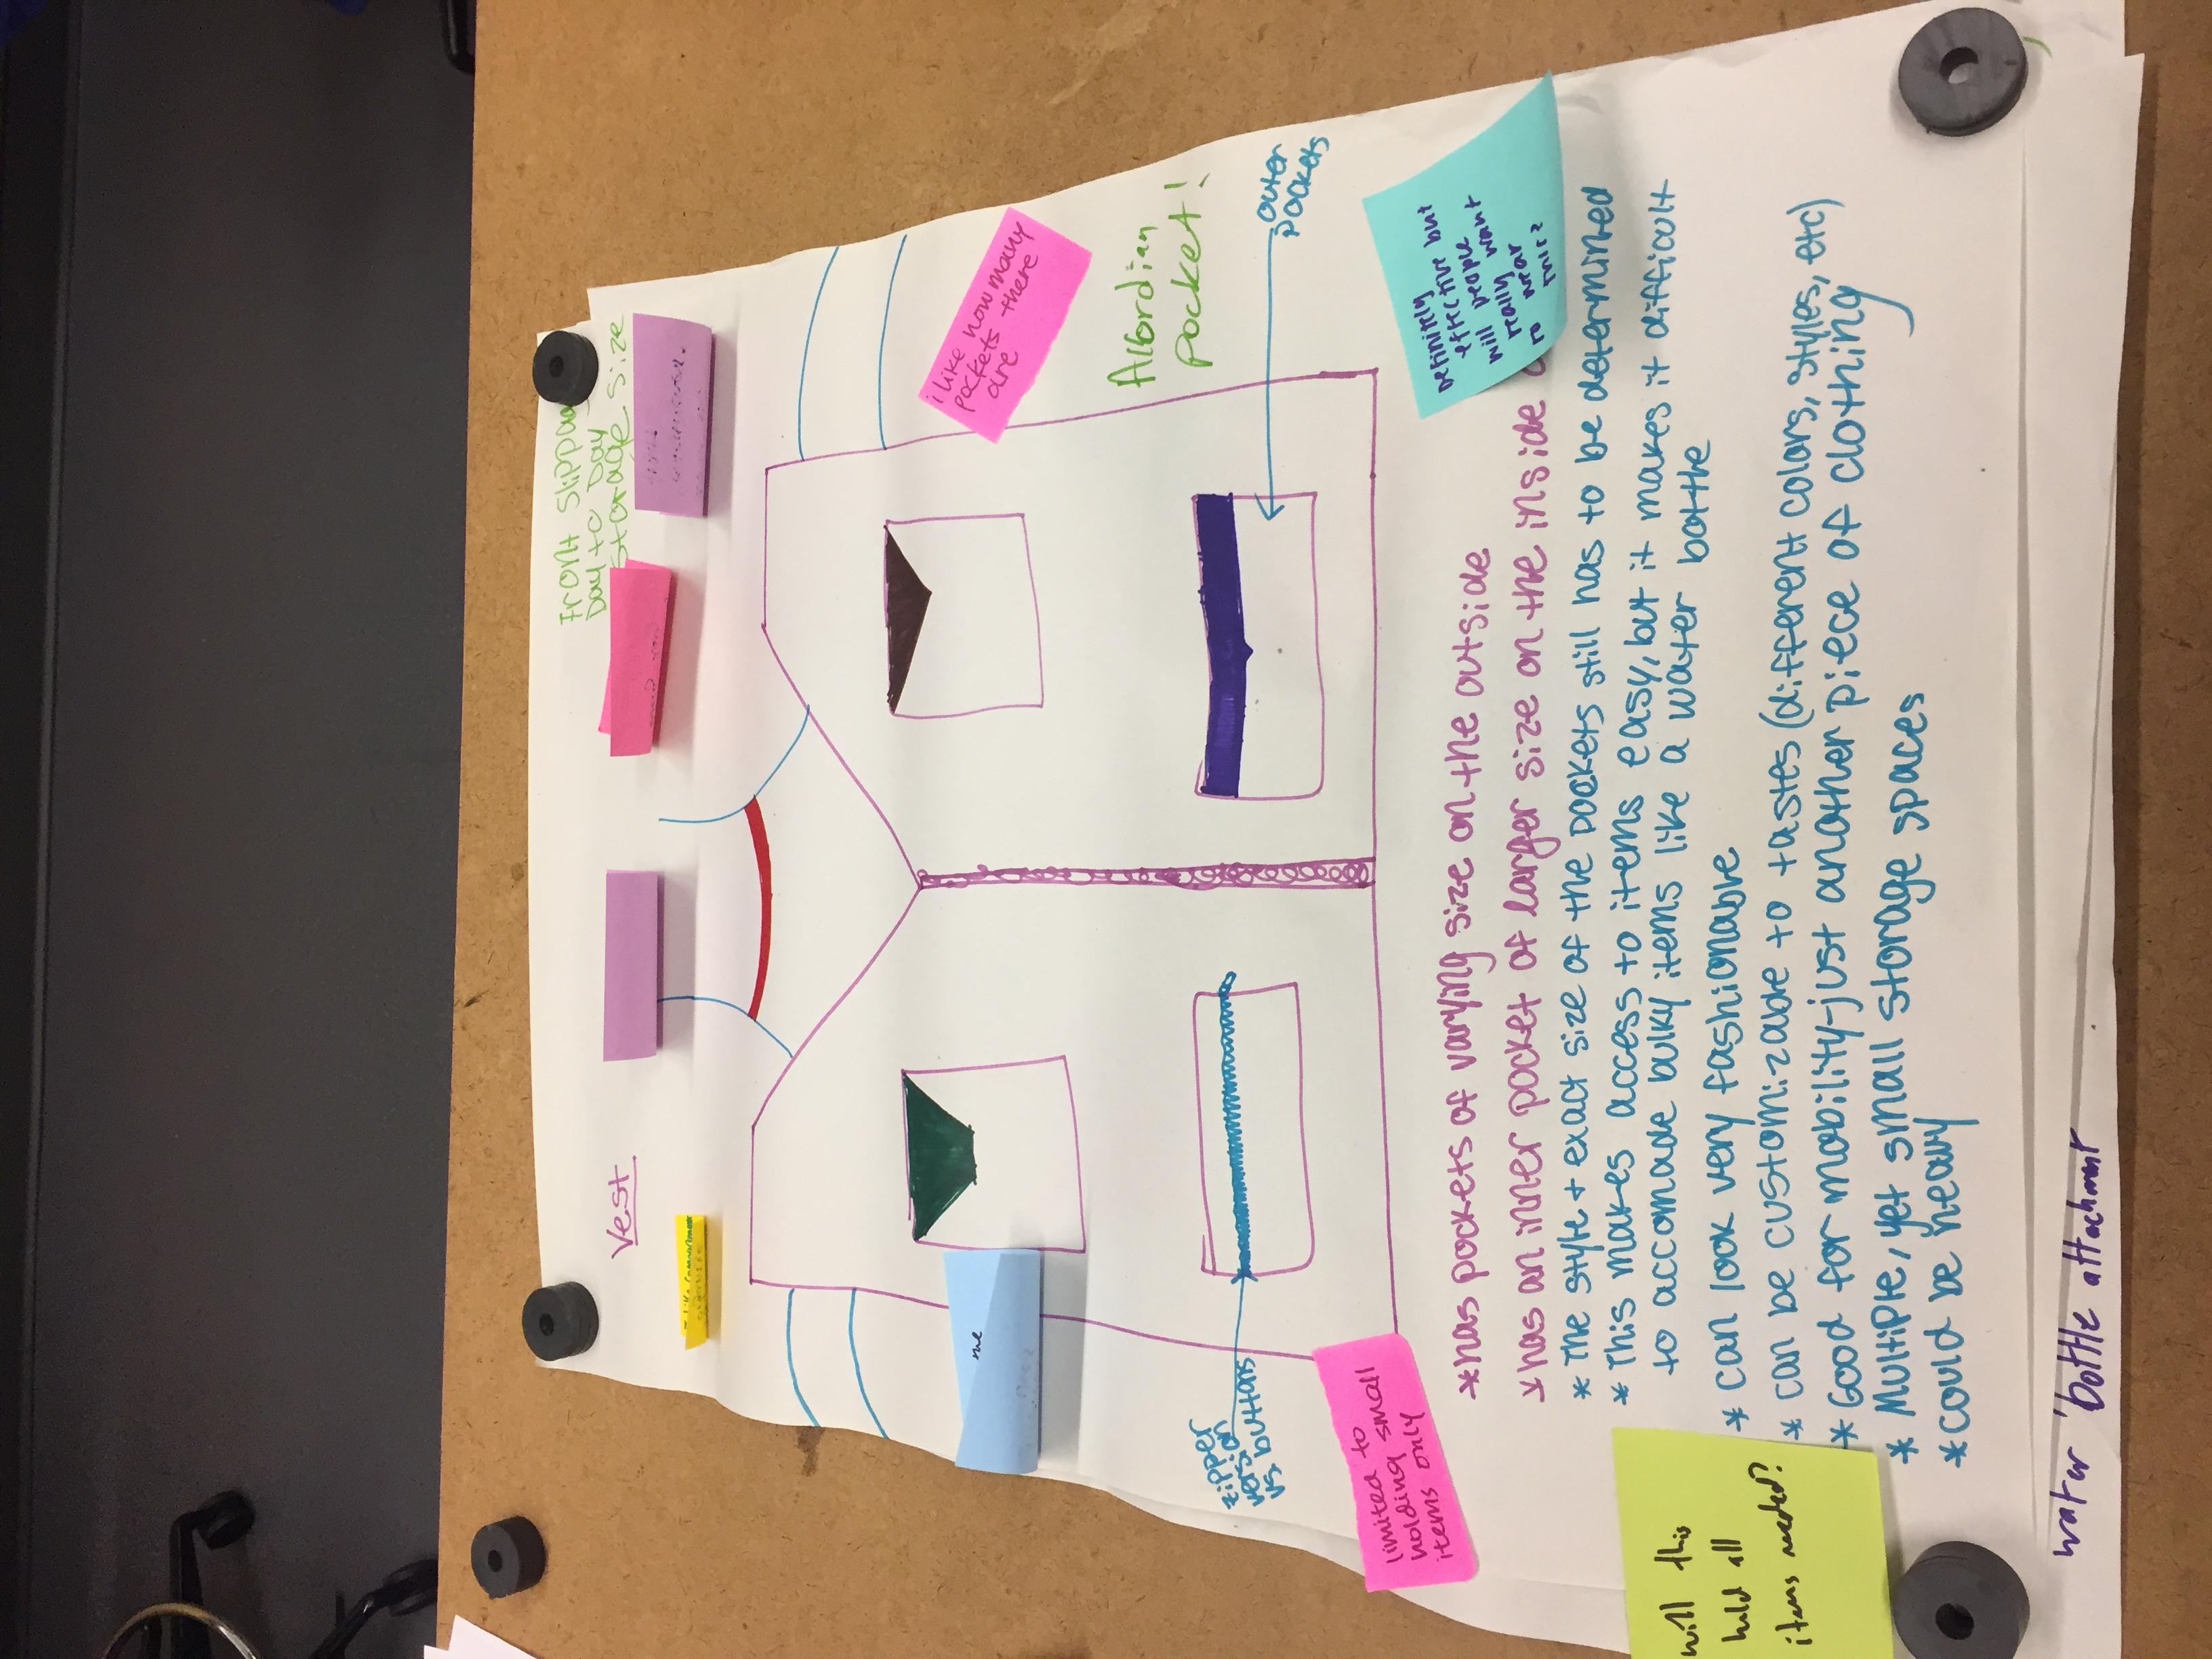
Figure 3: In Order from Up to Down: Sling Bag, Front-Facing Backpack, Vest
During the gallery walk, many valid and thoughtful questions came up about each of the designs. We wished to create a product with the same functionality of a small handbag that was also comfortable to wear for long periods of time. We decided that the vest would be the most effective in achieving our goal.
Design
The final product is a vest with four pockets. The vest has wide, 6.5 inch shoulder pieces to distribute weight across more of the body’s surface area. The vest is closed by one 2 inch by 6 inch thick piece of velcro. The velcro closure is quick to operate and easy to align and close with only one hand. The vest is made of an athletic fabric. This fabric is durable and does not stretch. The vest will not contort with different amounts of weight. It is meant to be worn as a top layer and the athletic style is popular right now. The vest measures 27 inches in length. Across the back it is 26 inches and each of the front pieces is 14.25 inches wide. The front and back pieces connect with arm seams that are 15.5 inches long. The length of the front side from the top to the bottom of the neck hole is 12.5 inches and from there to the base it is 15.75 inches.
The vest has four pockets of varying sizes. The pocket sizes were chosen and laid out in attempt to predict the best ways to balance weight. There is a large pocket on the bottom and a small one on the top on one side and two medium sized pockets on the other side of the vest. One of the things our community partner wanted was the possibility of being able to hold a water bottle in this vest. The large pocket is designed to hold a small bottle. It is 5 inches along the bottom and 10 inches tall. The pocket expands at the top to a full 7 inches. The pocket has a pleat at the bottom to give it depth. The two medium sized pockets are both designed to be versatile. The slightly larger one is 5.5 inches by 7.5 inches and the slightly smaller one is 5.75 inches by 5 inches. They can hold items such as a phone, notebook, wallet, or receipts. These three pockets are all closed with buttons. The buttons help the pockets lay flat, which reduces bulk. The button closures are also able to be used with only one hand, which is especially helpful if someone is using crutches.
The fourth pocket is smaller. This pocket is 5.25 inches across and 3.375 inches in height. It was designed for a set of keys, credit cards or cash. This pocket is the most secure of all the pockets. It closes with a zipper. The zipper has a key ring attached to it for ease of opening and closing. This pocket is close to the top and is very flat, adding to the security of it.

Figure 4: Front of vest, worn by Priscilla, with water bottle

Figure 5: Side of vest, worn by Priscilla, with Water bottle
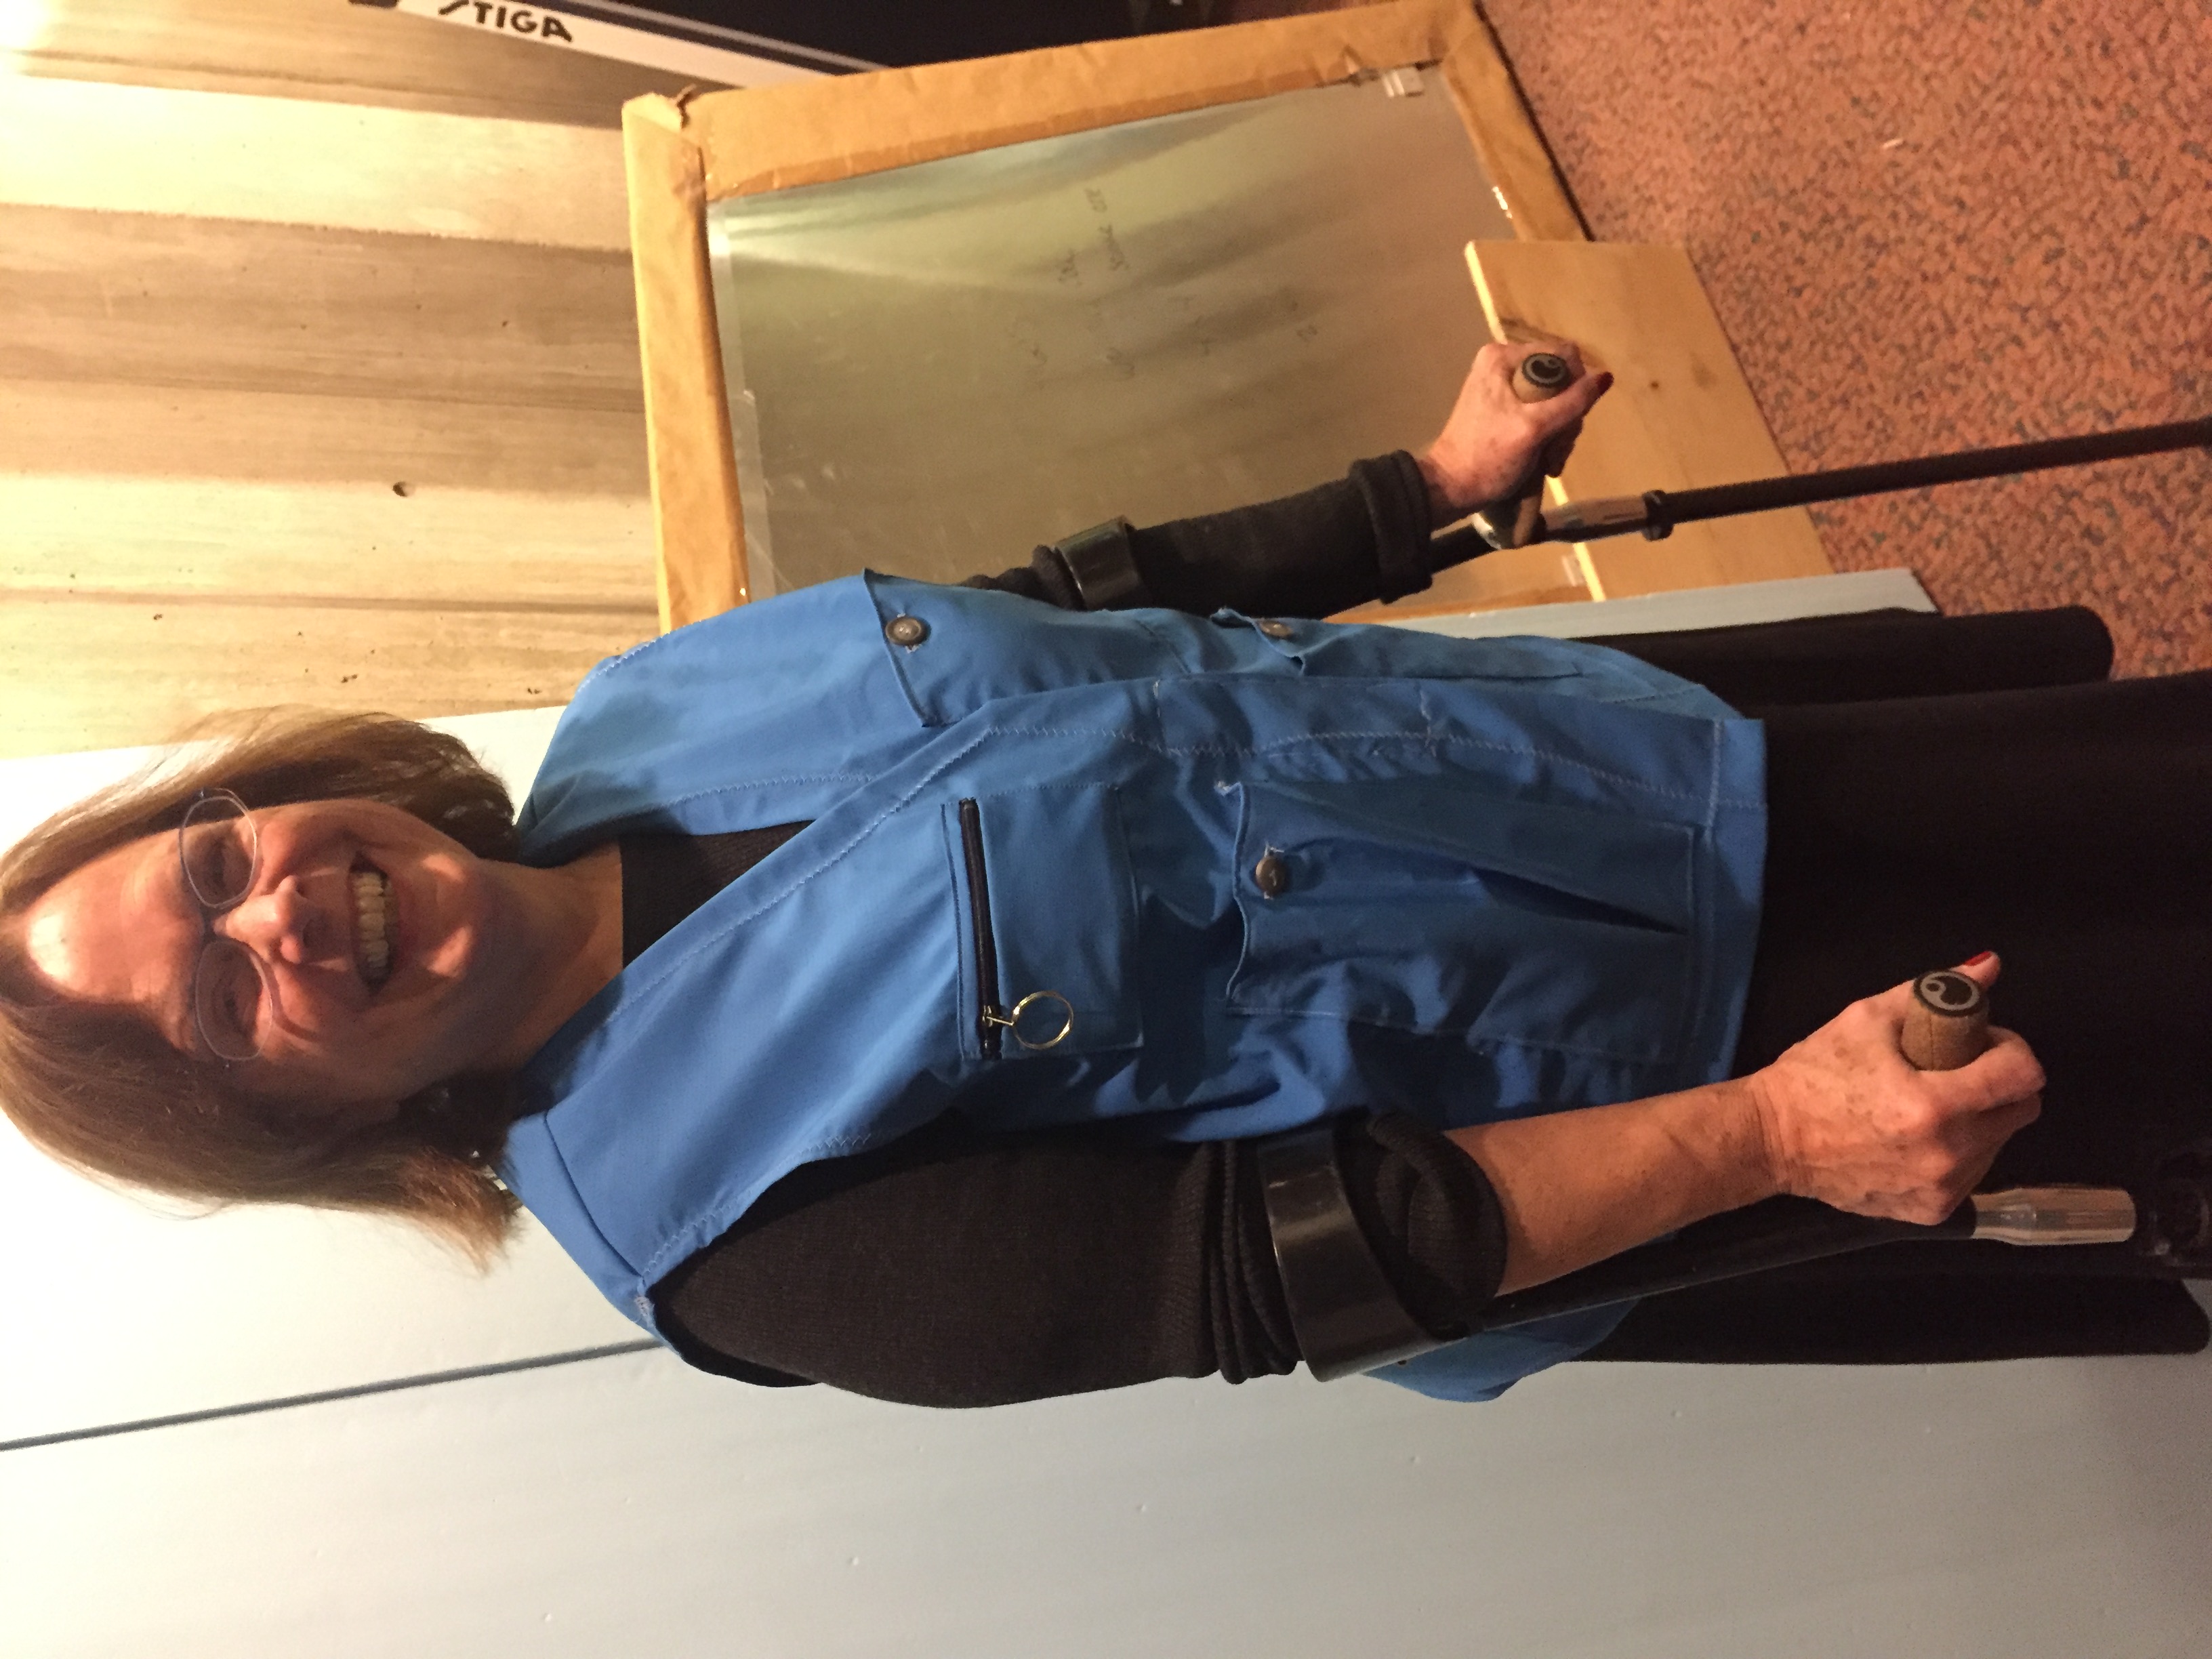
Figure 6: Side of vest, worn by Priscilla, highlighting pleated pocket
Methodologies and Results:
With each prototype of the vest, our team worked toward getting closer to perfecting a particular component of this product. Initially, we focused on getting an idea for the dimensions of the vest by making a paper model. This allowed us to understand the layout of the pockets on the vest, seeing what we would be able to fit and where things would be placed. This was a half scale model. In addition, we also created half scale models of a phone, a wallet, a notebook, credit cards, and keys. By using these models, we were able to try out different pocket placements. This model also allowed us to figure out the process of making an actual vest.
From this paper model, we moved on to understanding how the vest had to work with fabric. We understood that the fabric we used would not be similar to our final fabric choice, but making this model allowed us to understand if we could manipulate the fabric to accommodate the shape and storage we needed. It was made of scraps found around the shop and was fitted to our smallest team member. This was the first prototype that showed us we had a lot to learn about working with fabric. With this in mind, we reached out to Chelsea Kerl at the Wellesley College costume shop to help us better understand the demands of making a vest.
After deciding on a fabric, we worked closely with Chelsea to begin developing our more polished prototypes. We drafted a pattern to get the fit of the vest, using Priscilla’s measurements. When working with Chelsea on our initial prototype with the final fabric, we realized that we had not measured Priscilla correctly, leading to inconsistencies with the way we were trying to make our prototype, such as the vest being too long. Also, for this prototype we pinned on the pockets instead of sewing them on, allowing for the placement to be adjusted as the vest measurements changed.
With our next prototype, we hemmed the vest, and sewed on the pockets. To get Priscilla’s feedback on enclosures for the vest and pockets, we loosely constructed a belt with different pocket enclosures on it to model how each enclosure would function. This belt could be worn and pinned around the body to replicate the approximate placement of the pockets (see the below image, Figure 7). From Priscilla’s feedback, we learned that velcro would work best for the vest itself, while buttons were ideal for most pocket enclosures. She also suggested that the pocket designed for the credit card could be closed using a zipper with a key ring loop attached to it for easy yet secure access.
After deciding on enclosures, we added them to the prototype, spending time with Chelsea to learn about how to sew them on and make button holes. Finally, we explored adding a mesh pocket to our vest to allow for a water bottle, but with some feedback, we quickly learned this would not work. Instead, we pleated one of the larger pockets to accommodate a water bottle. Luckily, the pleat was successful, so much so that it can accommodate a small, reusable bottle of up to 750 ml.
Overall, each step in the process taught us something about what we either had to improve on for the vest or what would work well in the final prototype. We relied heavily on direct feedback from Priscilla and guidance from Chelsea to cater our vest to the goals of the project, and we believe the final prototype best showcases our attention to these goals.

Figure 7: The Enclosure Belt
Achieving Design Specifications
Our original design specifications were that we wanted the product to be light weight, easily accessible, water-resistant, machine washable, and have an ample amount of storage with possible space for a water bottle. See the below table for specifics.
| Attribute | Metric | Unit | Desired Value | Actual Value | Was the Goal Achieved? |
| Light Weight | Weight | Pounds/ g | Less than 5 pounds/ less than 2267 oz | 225.6 g | Yes |
| Quick to Open/ Access | Time | Seconds | 5 | 1.1-2.2 seconds | Yes |
| Water-Resistant | Water- resistance | Binary | Y/ N | Yes | Yes |
| Storage Space | Volume | Cubic Inches | More than 100 cubic in | 103.09 in^3 | Yes |
| Water-Bottle/ Thermos Addition | Can Hold Water Bottle | Binary | Y/ N | Yes | Yes |
| Machine Washable | Washable | Binary | Y/ N | Yes (Note: Do not put in dryer) | Yes |
As you can see, we were able to achieve all of our design specifications. We found that, by the end of the term, we had made a vest that achieved most of our initial goals. It was easy to wear and could carry the equivalent items a small purse would. Priscilla consistently called it comfortable. However, it is not the most aesthetically pleasing thing in the world. It was also designed specifically to the measurements of one person. Moving forward, the next step would be making a prettier vest in generic small, medium, and large sizes. The snugness of a individualized fit has diminished problems such as chafing and excess movement. In a more generic model, it is difficult to foresee how prevalent those problems would be.
Reception of the Design
Working closely with Priscilla throughout the design process allowed us to constantly receive her feedback and adjust our prototype to her suggestions. Because of this, we are pleased to see how well she has received our final prototype. She is especially excited about the choice of a light fabric, the fit of the vest, the storage abilities, and the ease of access for the pockets. While both Priscilla and us recognize that the vest cannot fully accommodate all water bottles for long periods of time, we are pleased to see how she can use the vest to carry other essentials such as a wallet, phone, keys, credit card, and small notebook comfortably, and she has shown excitement about this functionality of the final prototype.
Acknowledgements
We would like to thank Amy Banzaert for mentoring us throughout our process, Priscilla for advising us, Chelsea Kerl for teaching us how to sew and providing us with sewing resources and Maggie for help with fabric choices and sewing techniques.
Appendix 1: Sewing Instructions
Once the fabric is purchased it must be cut. The back piece is cut out once, the front piece is cut out twice and each of the four pocket patterns are cut out once. The first step to sewing is attaching each back shoulder seam to one of the front shoulder seams. Once those are attached the two side seams can be sewn. To finish the body of the vest all the raw edges–neck, front, armscyes and hem–must be finished by folding the fabric over and securing it.
Then the pockets can be added. The first thing to do with the pockets is add a button hole to the three largest at the top edge. Then those three top edges can be finished by folding over and securing. The two medium pockets are then attached on top of each other to one side of the vest, making sure to turn in all the raw edges when sewing. The largest pocket will need to be folded to create a one inch pleat in the middle of the base. This pocket can then be sewed to the other side of the vest at the bottom. The raw edges must again be turned under.
For the fourth pocket, it must be cut in two horizontally near the top. The zipper is then attached to each side of the pocket, making sure they line up with each other. This pocket can then be sewed onto the vest above the largest pocket with the zipper facing out. A key ring is then placed onto the zipper.
Then the buttons and velcro can be added to finish the vest. The buttons are hand sewn onto the vest underneath the three buttonholes. The velcro is sewn onto the center of the vest, right when the front of the vest becomes vertical. One piece of velcro is sewn to the outside of the front side and the other piece is sewn to the inside of the other front side.
Appendix 2: Operating Instructions
This vest is worn like a typical vest. The pockets can all be opened and securely closed. The largest pocket is designed for a water bottle. The velcro at the center attaches to each other to close the vest.
Appendix 3: Sewing Pattern
Figure 8: General Shape of Vest Pattern Pieces
Figure 9: Pattern Used with Measurements
Figure 10: Pocket Patterns
Note: Pockets are in the same layout as they are on the vest
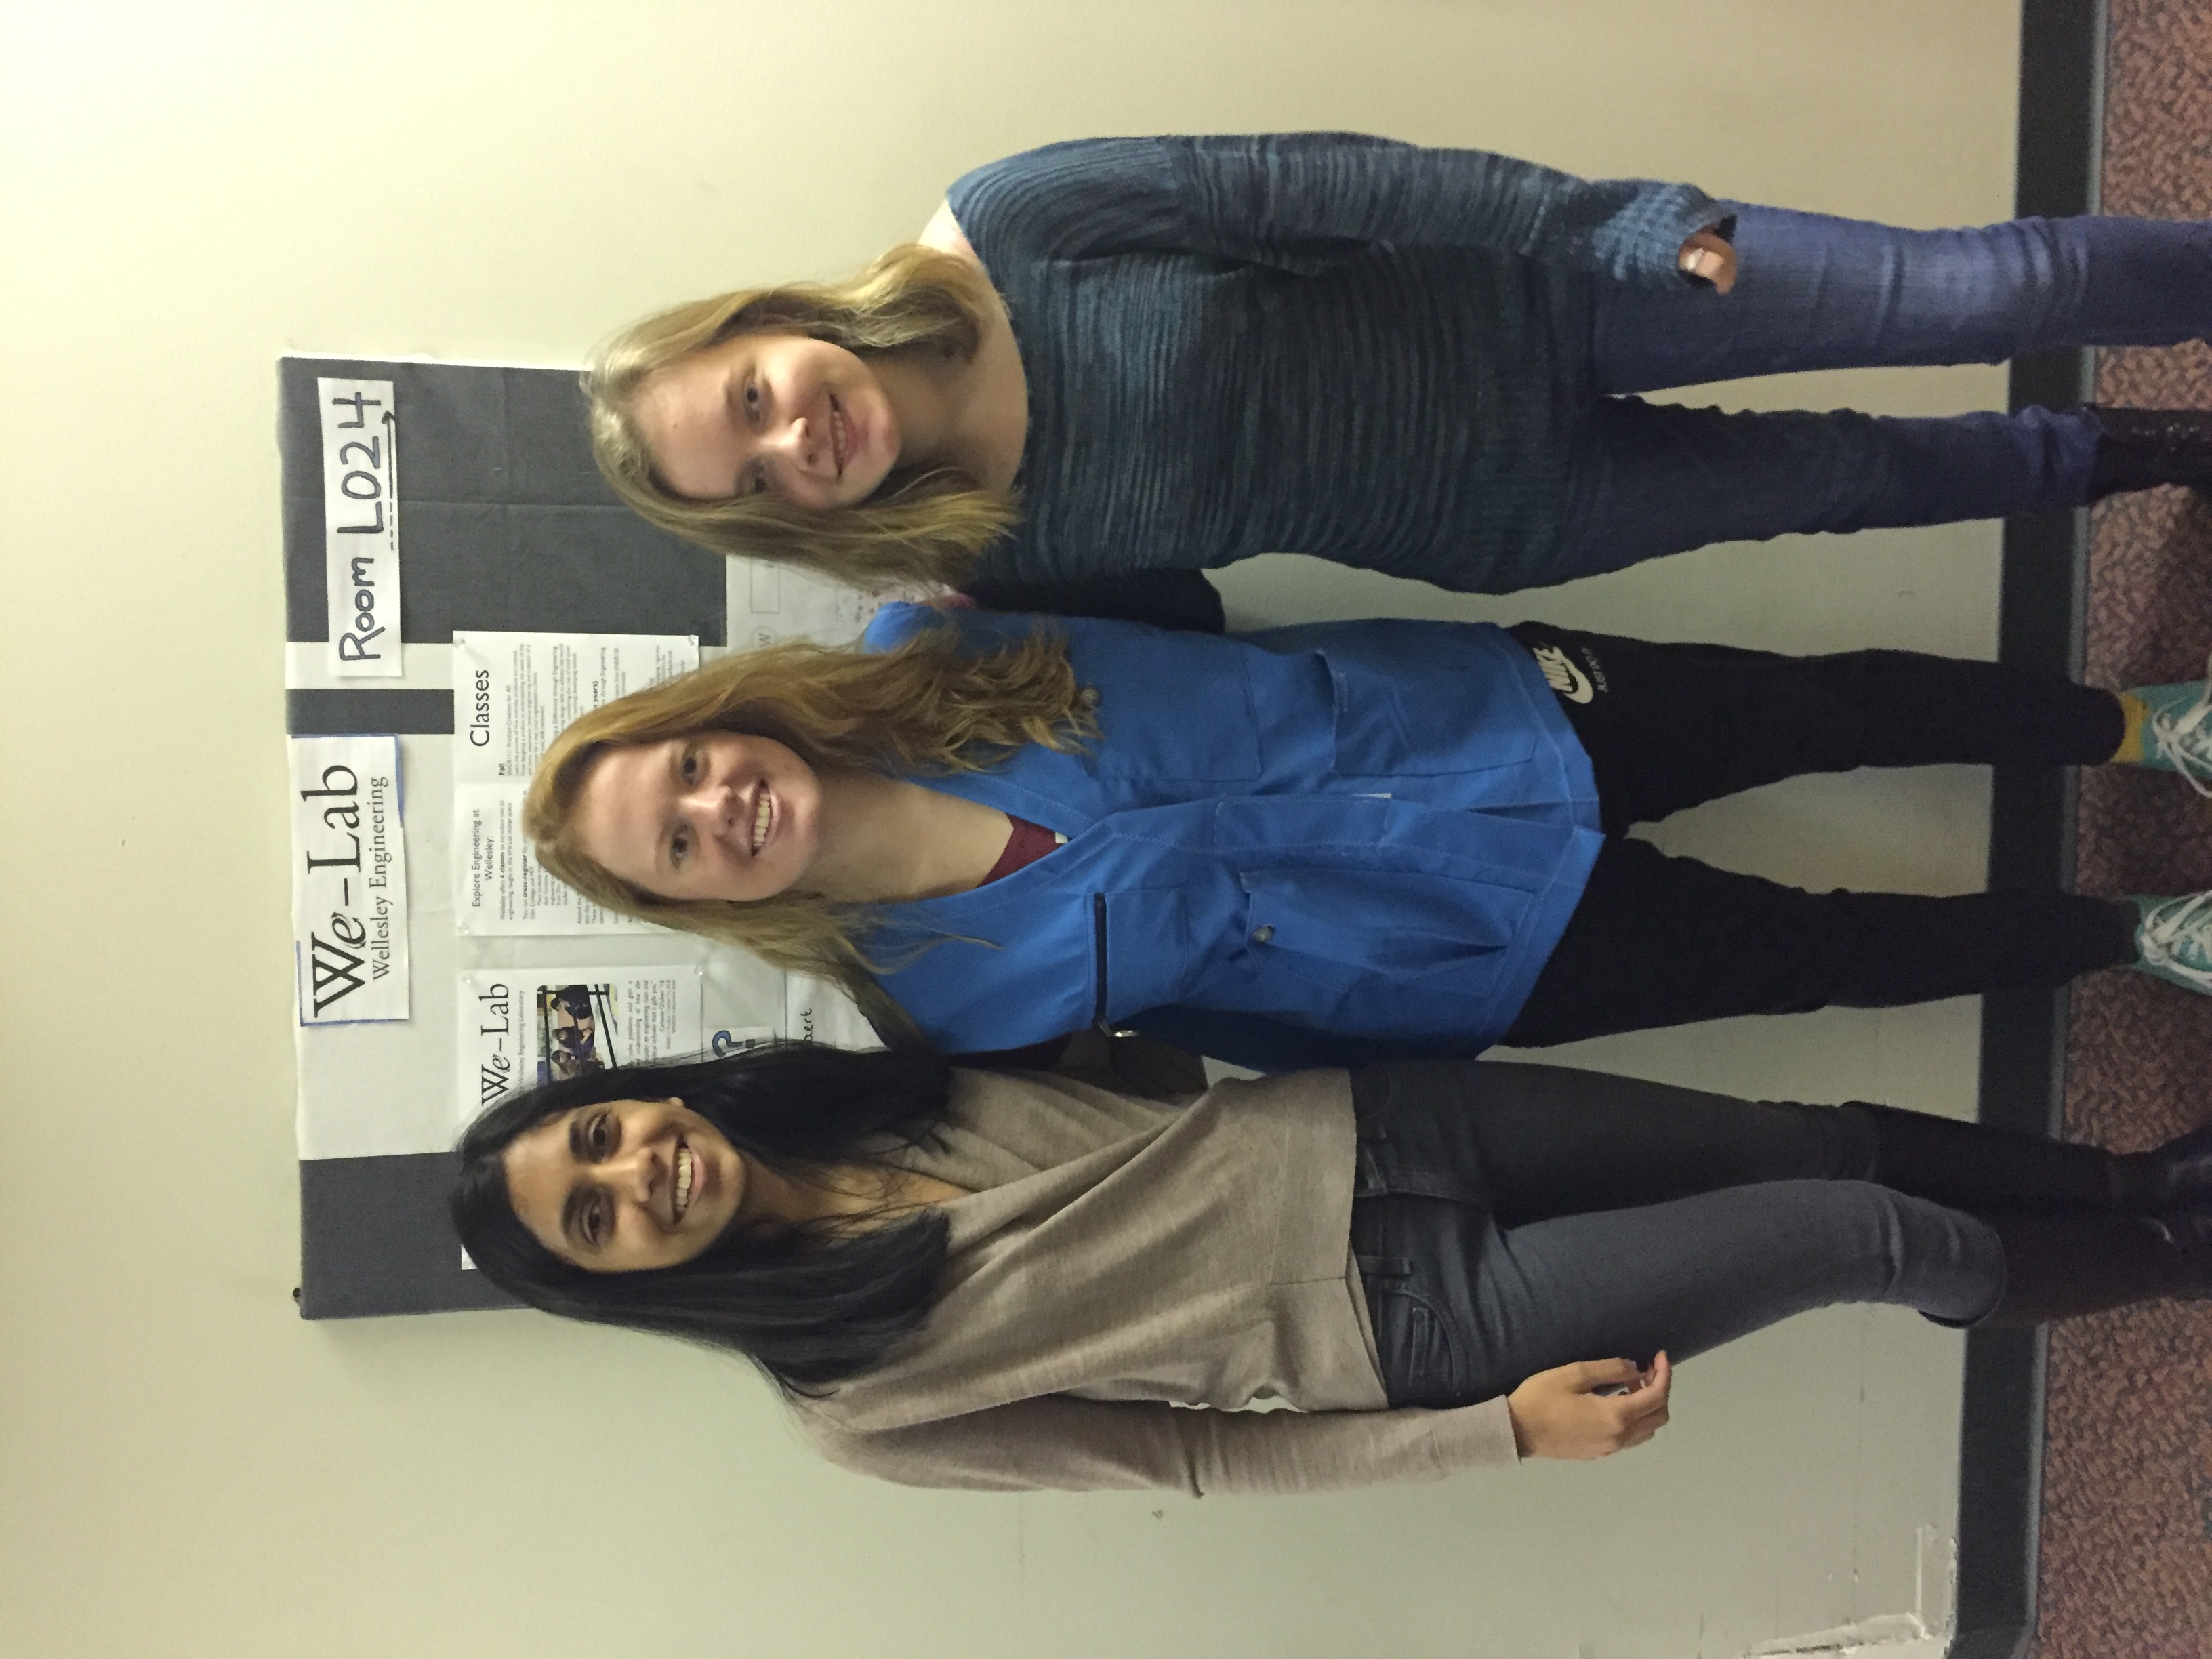
Our Team
From Left to Right: Shivani Nookala, Alex Shook, Maddy Buxton