Prepare yourself… This post is obnoxiously long…… You have been warned………
PROJECT DESCRIPTION
The goal of my project was to solve the Child Study Center’s problems with inefficient, ineffective transitions from free play around the classroom to group time together on the classroom rug. Currently, the teacher is setting out mats and name cards for each of the kids, with the expectation that the children will go to their respective name cards, sit down, and wait quietly. However, in reality, there are two problems with this system:
1) The children mangle their paper name tags
2) The children quickly lose interest, and leave their mats
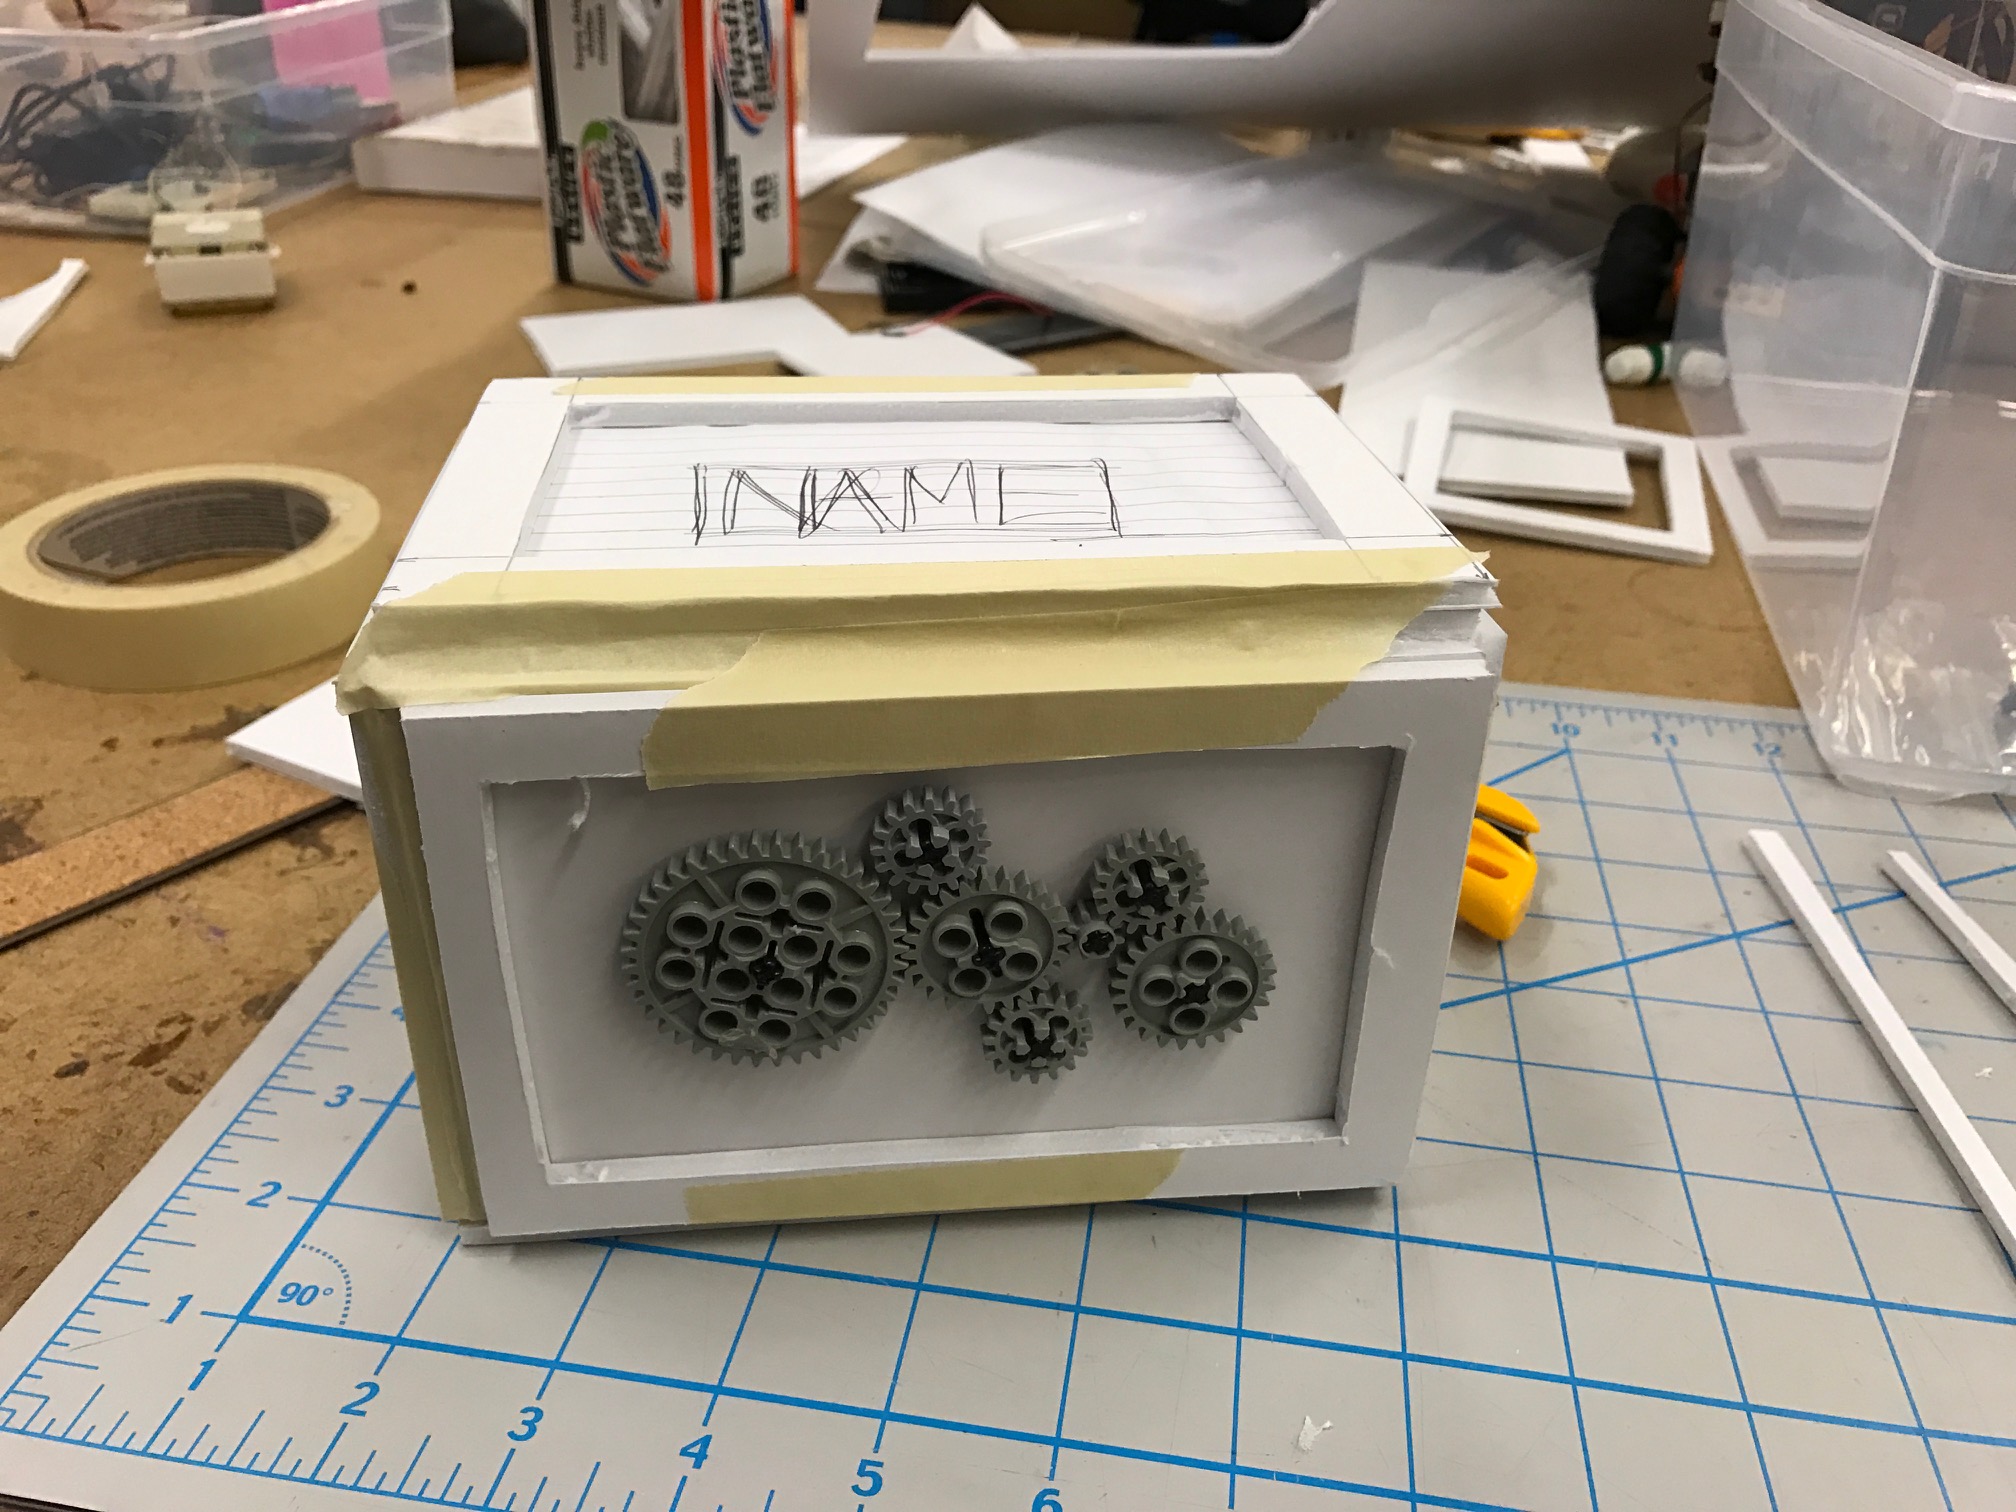
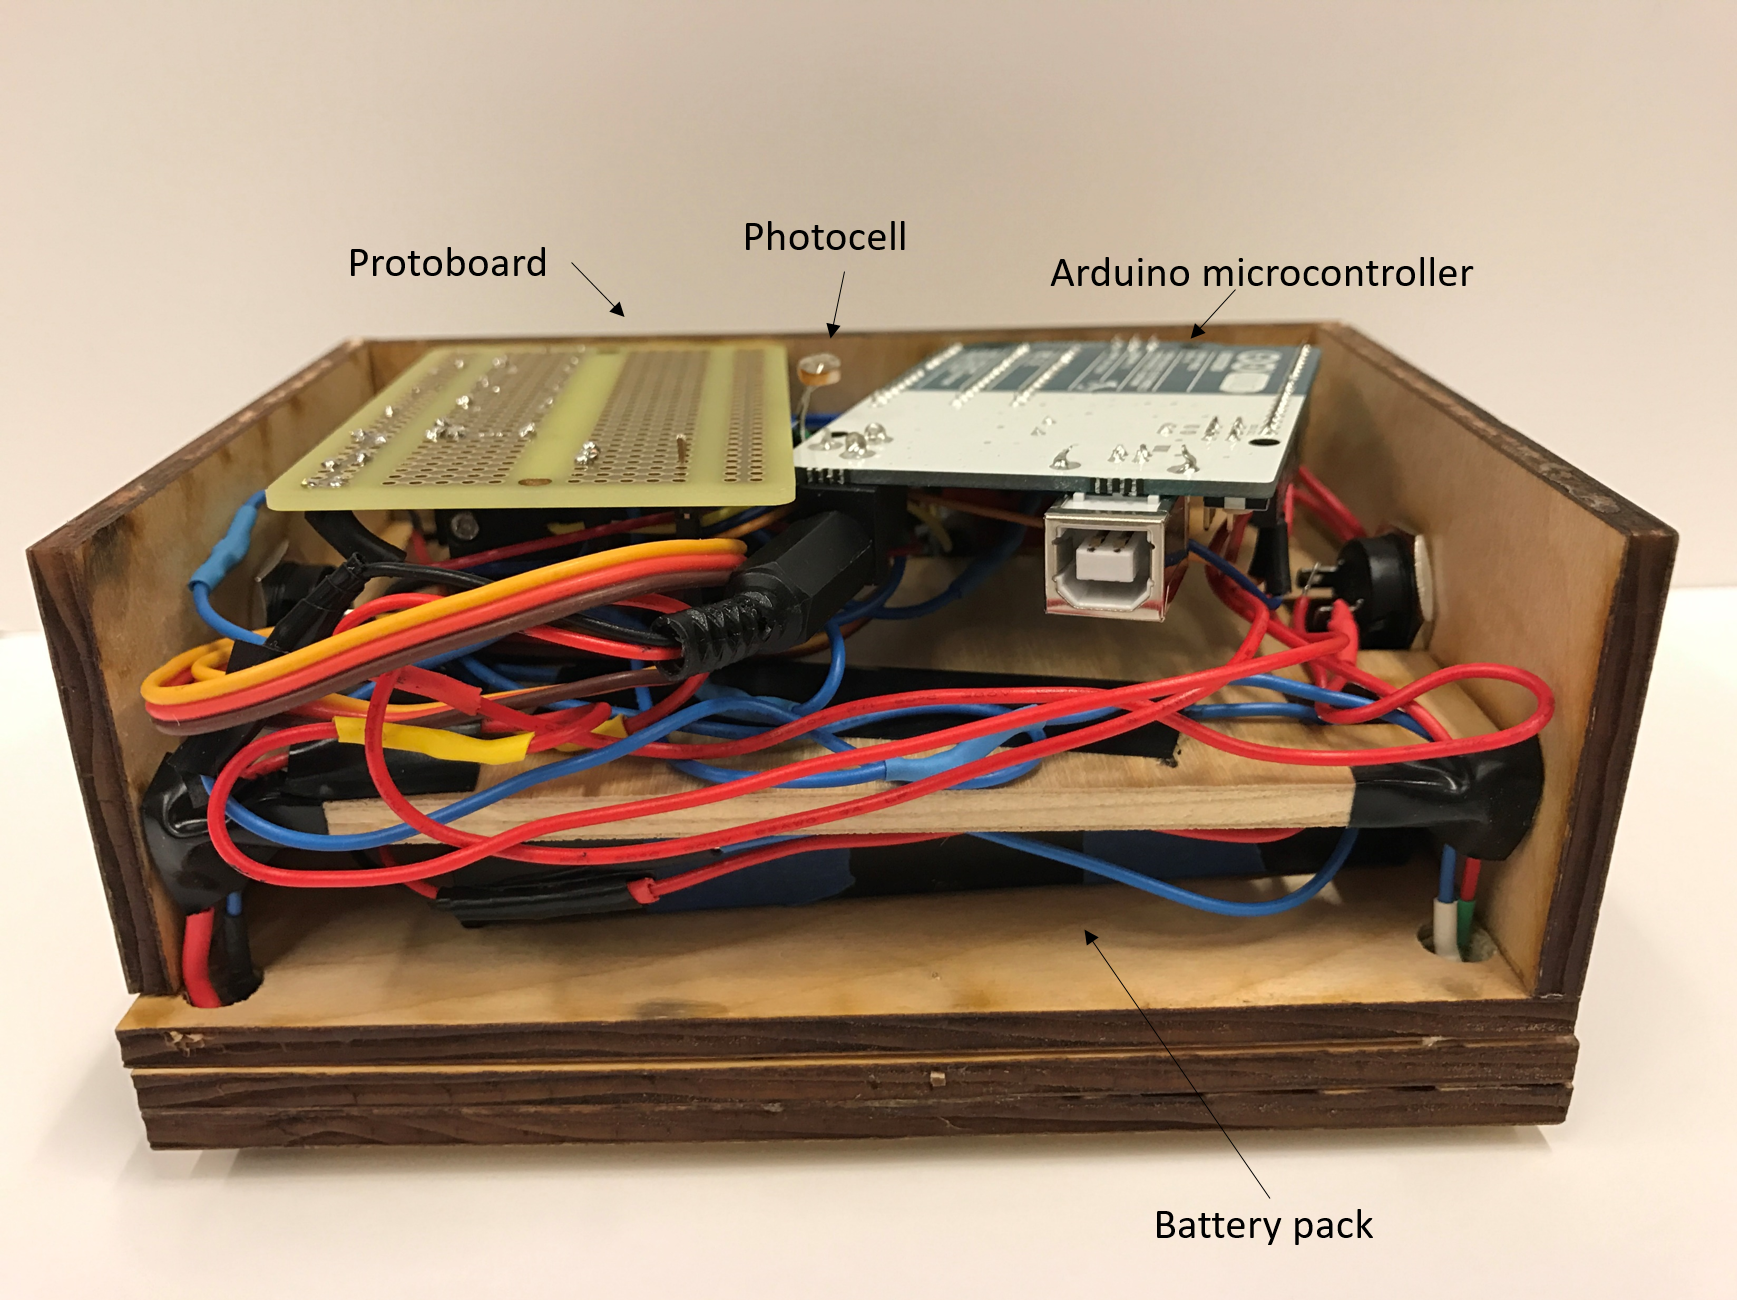
To solve these problems, I have created the Blink Block, a block of wood that preserves the name tags, and keeps the children entertained, but not completely distracted, as they wait for everyone to gather and group time to begin. The block has four LEDs on the top face next to the name, a gear train on one of the side faces, and pair of buttons on each of the other side faces.
To set up:
Each block requires 6 AA batteries, and a unique name card. The top frame can be loosened to slip a name card under the wood, and then tightened so the children cannot wrinkle it like they can with the loose laminated cards.
Then, when it comes time to transition, the teachers can set out the blocks just as they used to set out the
If both buttons are pressed and the photocell reads that the bottom of the box is dark (i.e. set down on a surface), then the gear train will spin and the LEDs will light up.
Features:
The block has two buttons on opposite sides, so both of the child’s hands will be occupied.
Photocell needs to read dark in order for the lights to turn on, so the children are less likely to pick up and throw the block across the room. The materials used, especially the six batteries, give the block a bit of heft, which will also discourage throwing.
The back panel is unadorned, but removable in case the batteries need to be replaced or the Arduino needs new code uploaded.
Once both buttons are pressed, the Arduino turns on and initiates the photocell reading. Because this takes a few seconds, this creates a bit of a delay between when the circuit is initially completed and when the LEDs turn on. This feature doubles as a built-in debounce-er (the lights won’t flash if the buttons are pressed rapidly, they’ll just stay off)
If a specific child is struggling with the coordination, it is possible to tape over one of the buttons or the photocell to make the specific block easier to handle.
BLOG POST HIGHLIGHTS REEL
The first week, I came up with my original vision was for a much smaller block that consisted of four buttons:


However, after talking with Professor Gleason, she recommended less buttons and another, more interesting mechanism, as well as a larger box, so the children would be less likely to throw it.
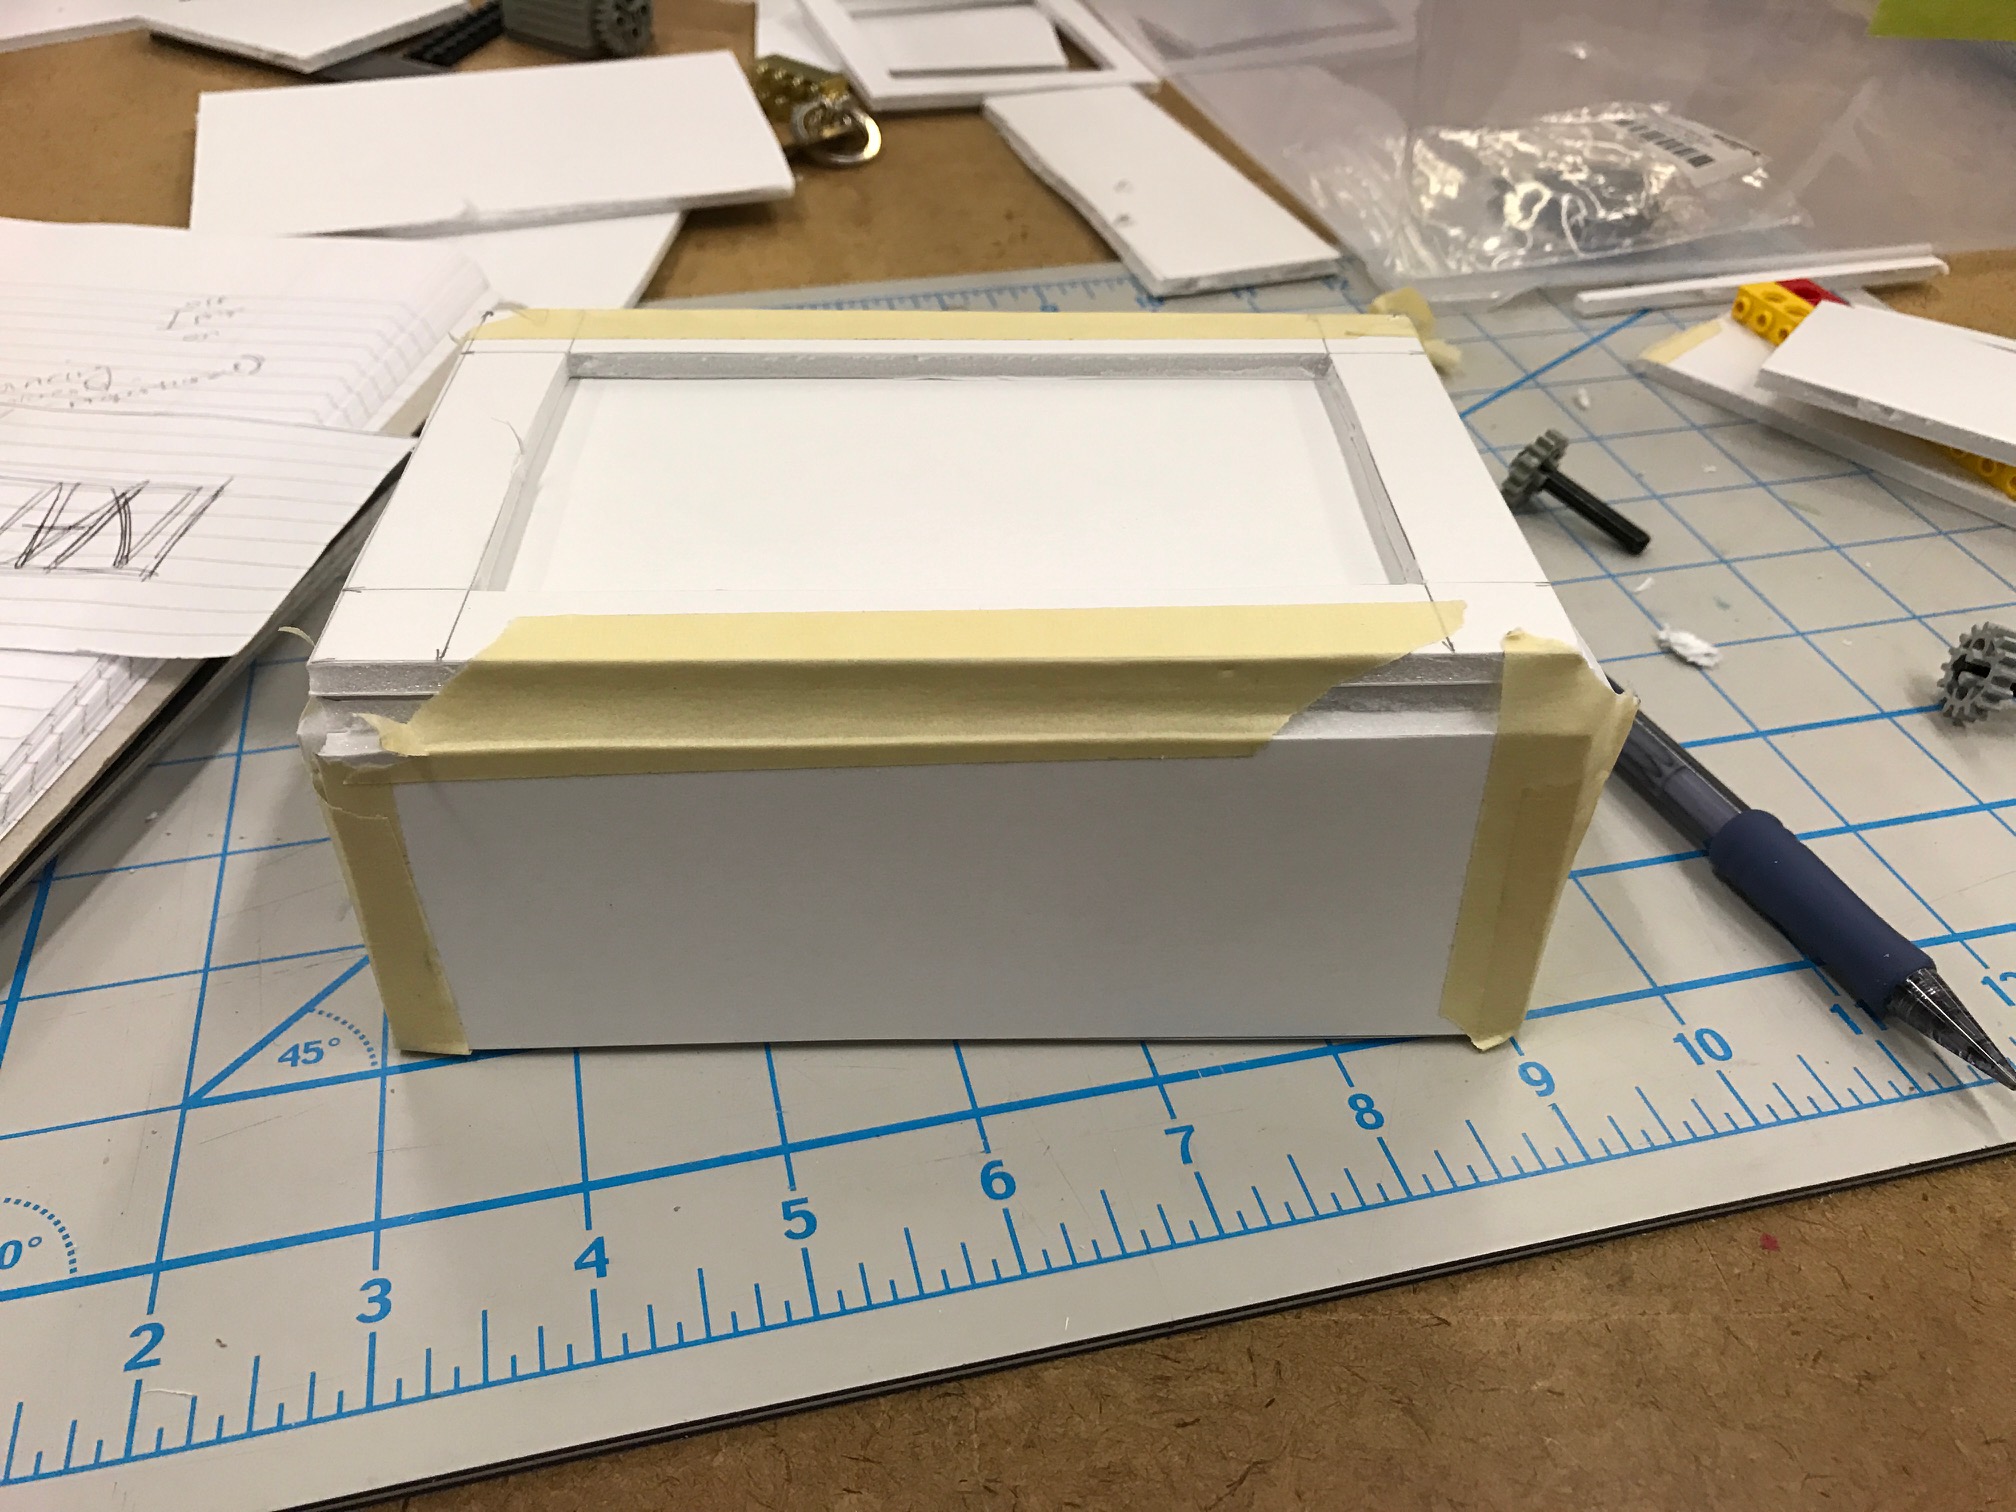
The second week, I began prototyping out of foam core and quickly realized that fitting all of the components into the box would not be as easy as it had originally seemed. My originally palm-sized box became something extremely large, before I decided to halve it and settle on the current dimensions 15x10x5 cm
To make everything fit, I began messing around with a center divide, adjusting the number/placement of holes throughout as necessary.

With a design settled on, I modeled everything in solidworks and confirmed all of the measurements with an assembly I made. I’d like to show an image of my SolidWorks assembly, but it’s saved on the drive of the computer that’s had a [DO NOT TOUCH] post it on it, and I don’t want to accidentally sabotage someone else’s hard work.
Finally, I laser cut my materials out of plywood, and began assembling everything.
I drill pressed a lego gear so that it would fit on the servo motor I was using.
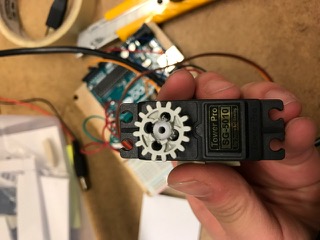
The rest of the assembly required me to solder as I went along, and electrical tape the wires to keep them in order.

And eventually, I glued it all together and weighted it down with a power drill, went to dinner, and came back to an almost solid box!
(Yes, this truly was a highlight)

To screw on the back panel, I needed to create surface area to screw into and embed the threaded rods.


Then I could close everything inside my block, and the hardware was finished!
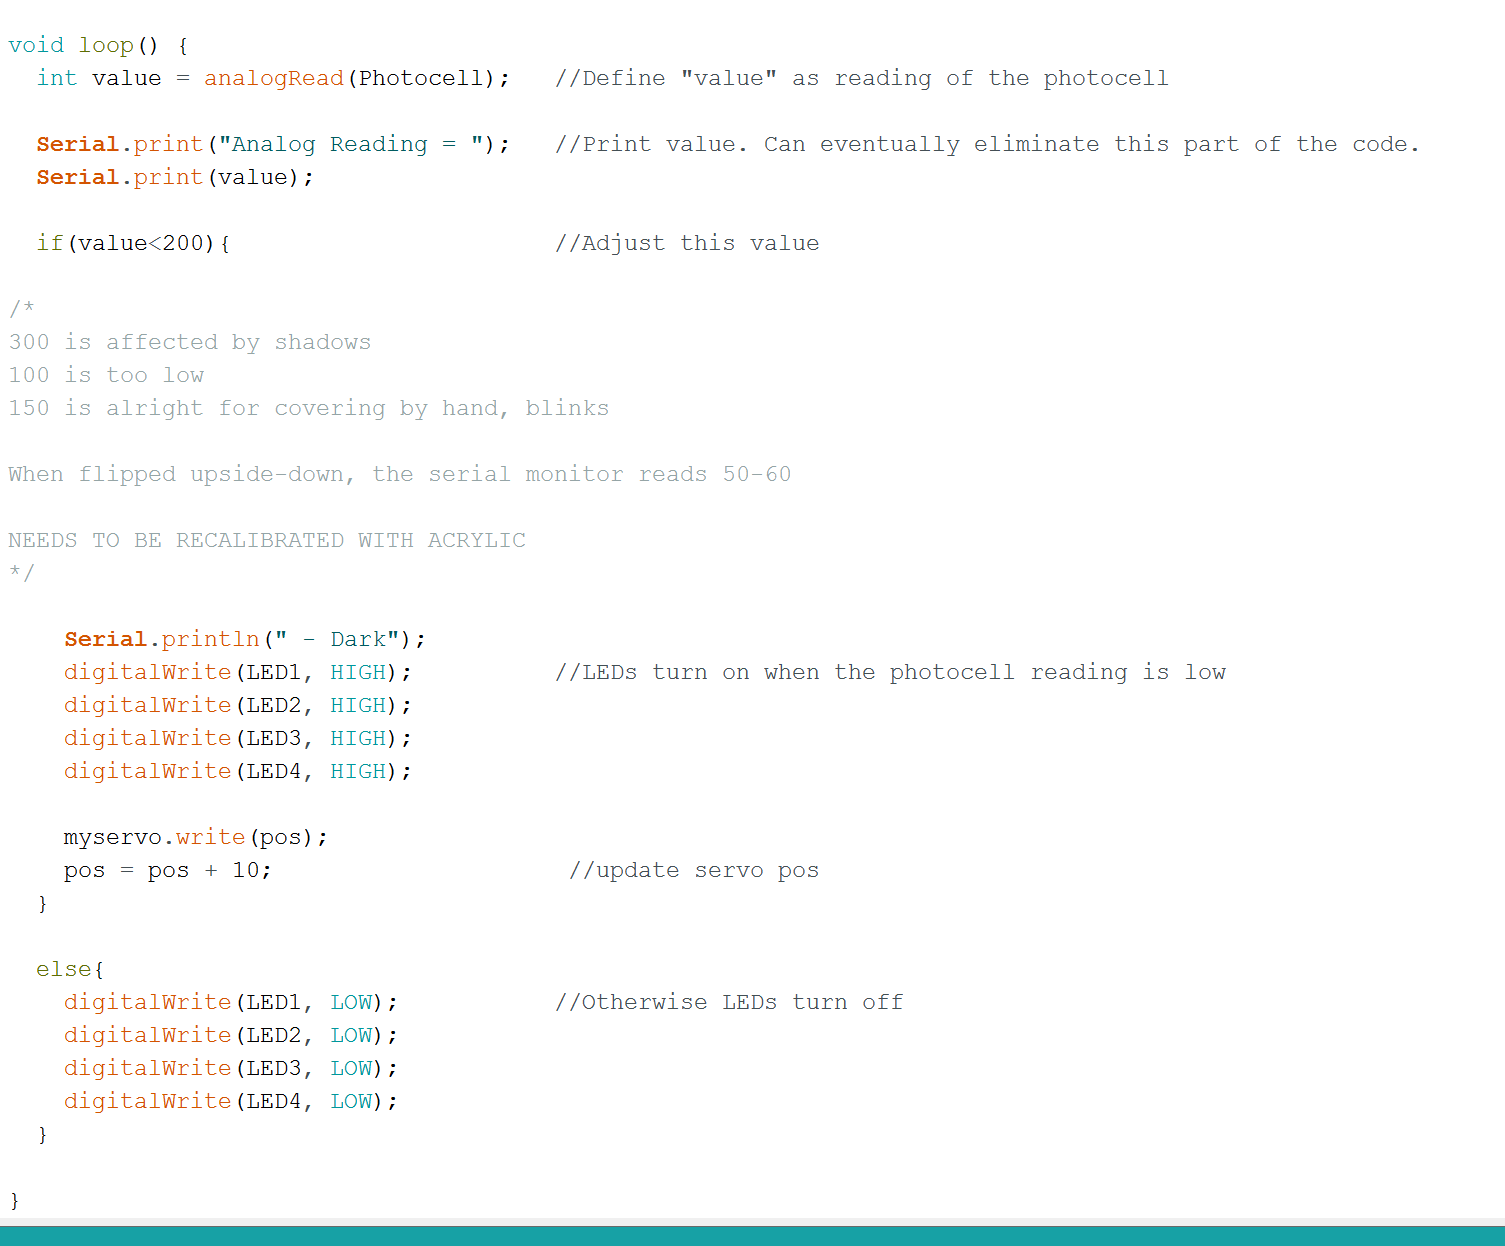
As for software, I designed this concept with my limited knowledge of Arduino in mind, so there wasn’t too much that I needed to learn. This is the code I was going off of, with the bounds for value in the if statement eventually decided to be 10.
When I was initially testing the code on my breadboard without the buttons as circuit breakers, I found that the LEDs would strobe if the photocell was in a borderline reading, so I believed that debouncing would be necessary, but when I implemented that same code with the buttons, the buttons themselves created a delay in the speed of the signal processing, and effectively debounced the code for me. Also, with the rim of the box, it is nearly impossible to reach the borderline strobing value, unless you use your hand to cover part of the photocell. Adding an acrylic sheet on the bottom would eliminate this completely.

VIDEO OF FINAL PRODUCT
Working motor movement outside of box (somewhat erratic due to inconsistent photocell readings):
Working lights:
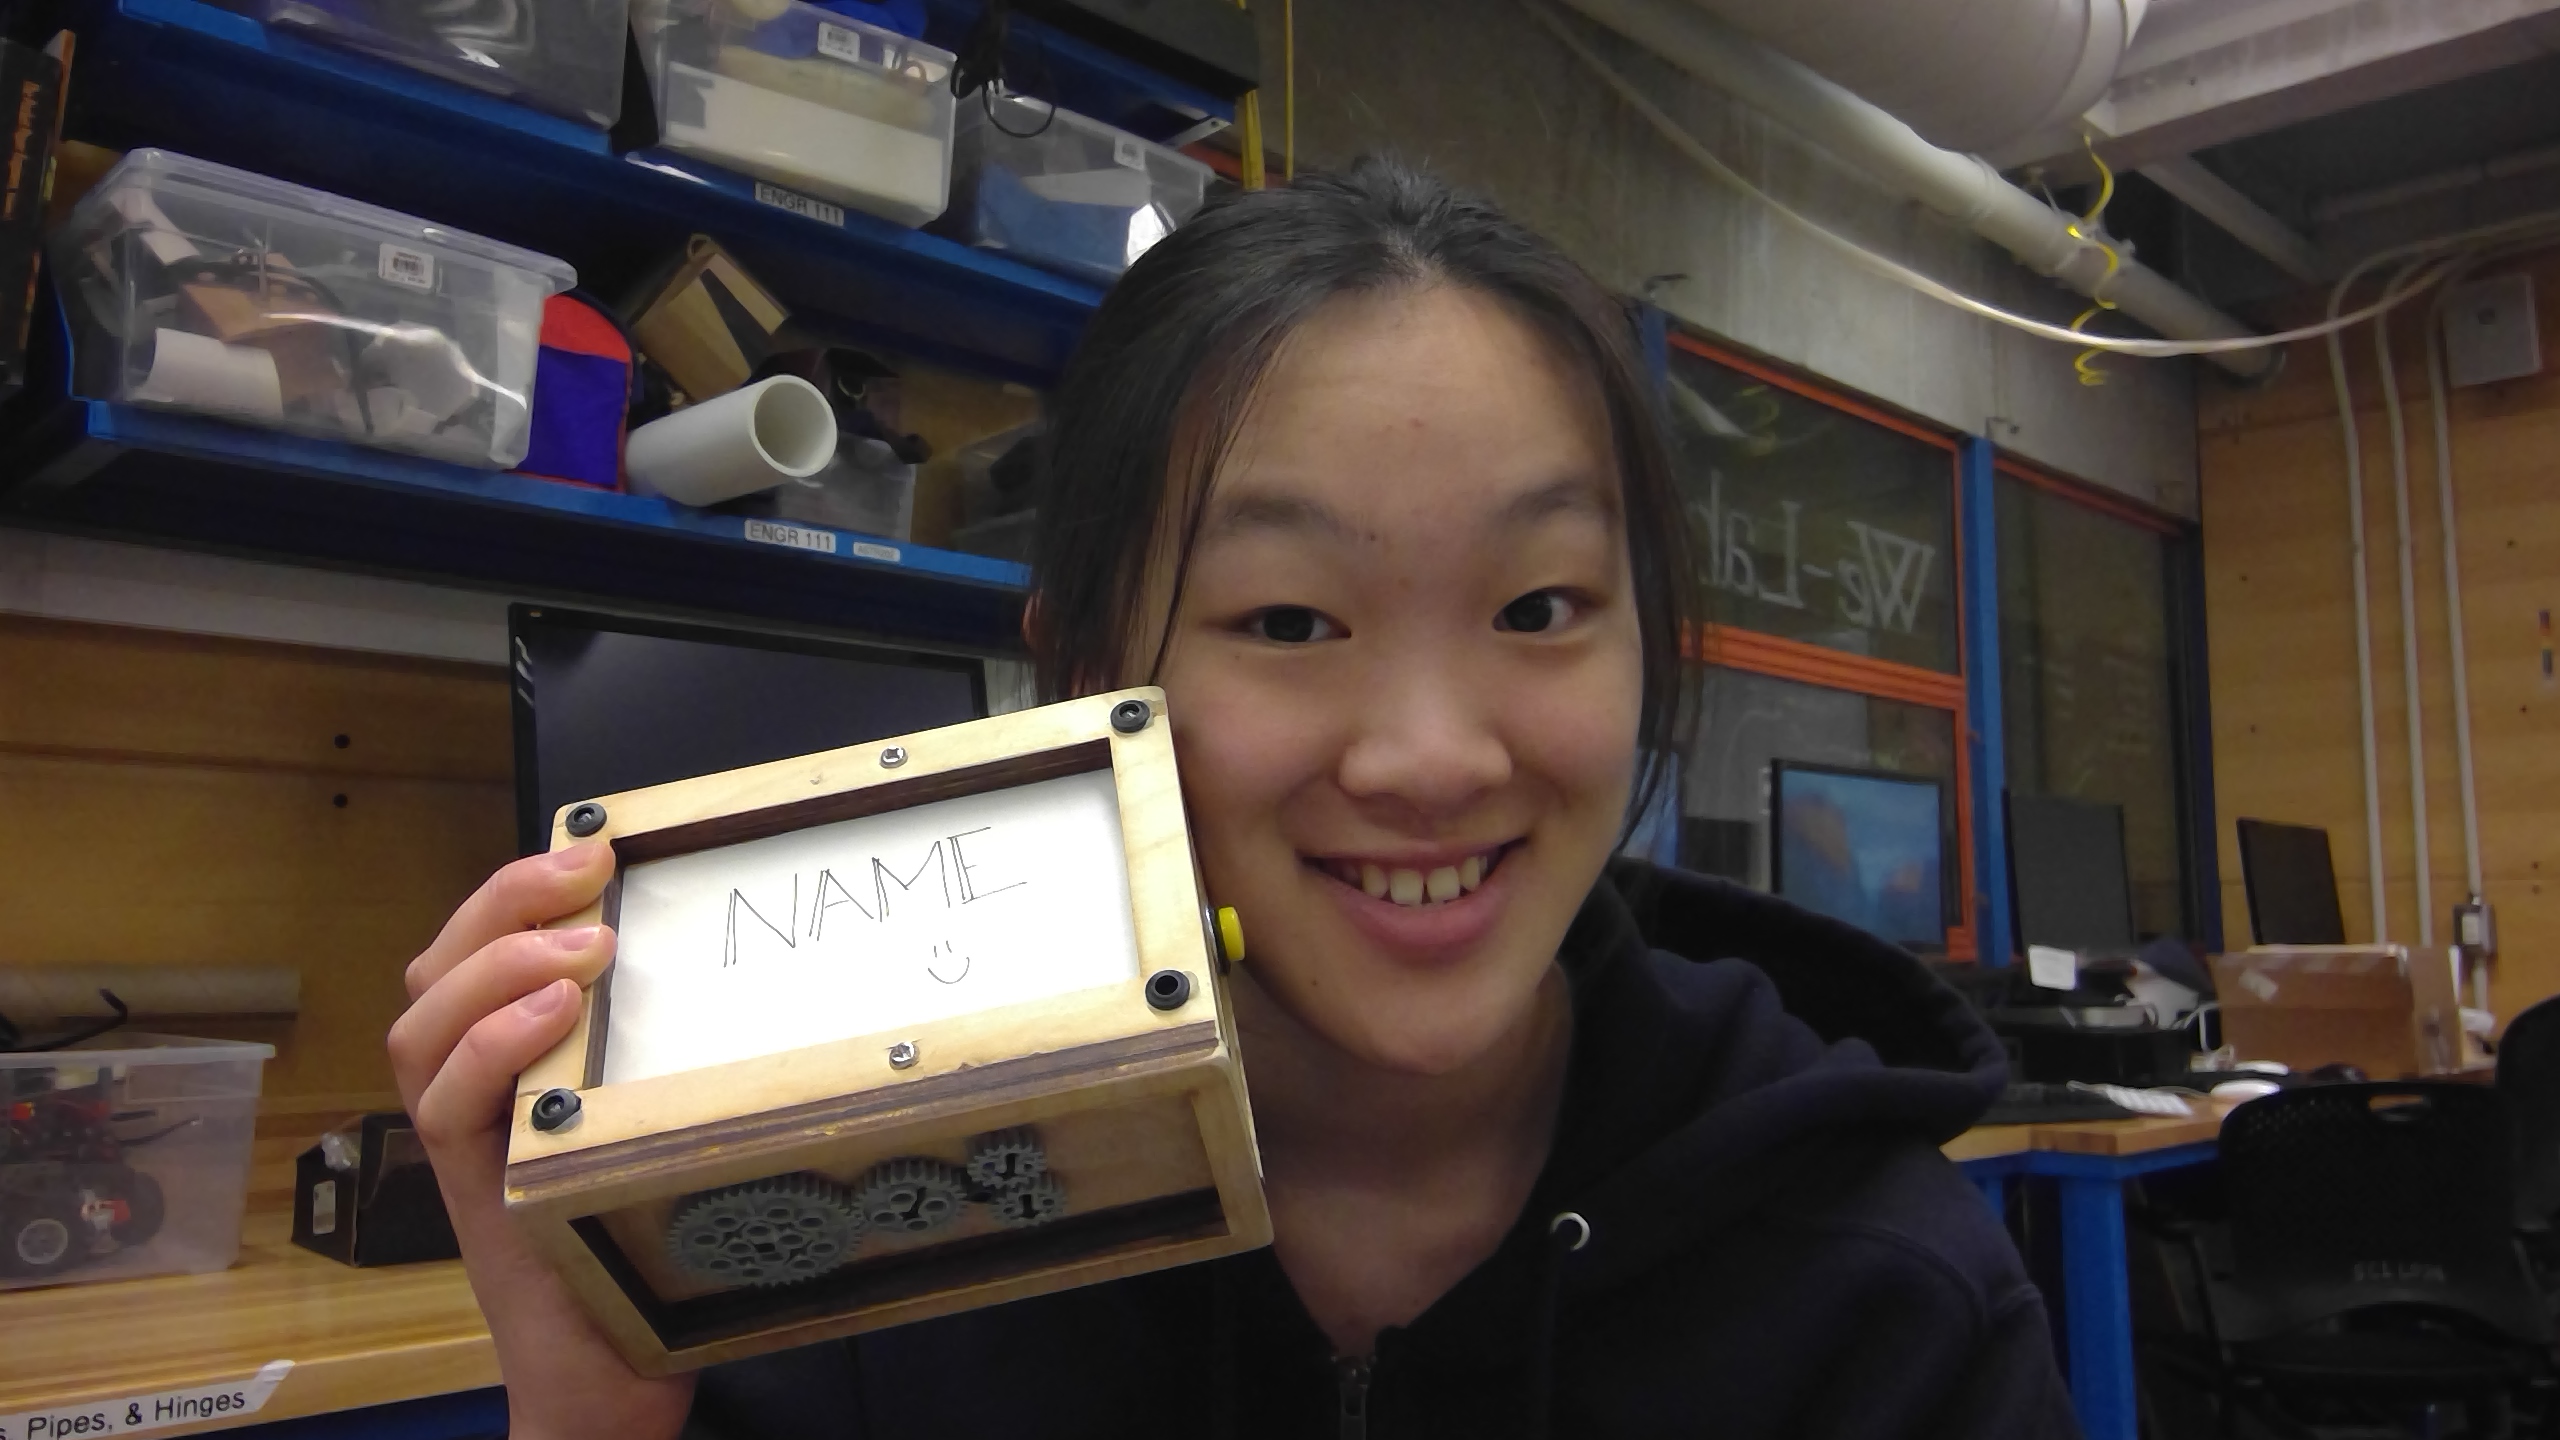
PHOTOGRAPH OF FINAL PRODUCT

(WITH TEAM)
REFLECTION
If I had more time, I would have of course liked to continue troubleshooting my motor. I believe the problem may have to do with the different amounts of power drawn when the Arduino is connected to both the battery pack, and my laptop, versus just my laptop. I decided to test this out with a multimeter and read the voltage across the motor before and after unplugging my laptop, but it stayed the same. If the issue had to do with power, then my next plan was to check for a change in current. That was when I made the mistake of switching the multimeter into an ammeter without rewiring the circuit, and I created a short that actually broke one of the USB ports on my laptop…. So I decided to call it a night. I’m really still not sure why the motor refuses to work inside the block.
I also would have liked to round the edges of the block, either with a belt sander or a router, so it would be less dangerous for children. Unfortunately, I planned poorly and could not find a time to ask Larry for access to the tools I needed. Instead, I ruthlessly attacked my finished product with a piece of sand paper, which definitely helped.
I did not end up finding the time to use acrylic to protect the side panel with the gears and the bottom panel with the photocell. I had planned on getting the specific measurements of acrylic I needed after I the rounded box, because I only had enough material to cut once (I gave Hanna and Keer’s group my extra acrylic panel). I did test joining acrylic to plywood with superglue, and that worked seamlessly, but because I didn’t have the final laser cut panels, I could not finish this aspect of the block.
WORKING WITH TEAM MEMBERS
I did strive to keep the magnitude of the project and the capabilities of one person in mind when I design my idea, though, so I wouldn’t attempt anything that would be completely impossible on my own, but the nice part about having a team member is the ability to divide and conquer, and to have someone as a safety net in case original plans (like getting something laser cut, etc.) fall through. However, when it came to assembling everything in one go, fighting with a servo motor at ungodly hours, and modeling in SolidWorks, I’m really glad I was on my own, because it eliminated a lot of problems that could have arisen from poor communication. Really, the final assembly aspect would have been a bit of a nightmare with multiple people crowding around one tiny box, both trying to solder and assemble at the same time. That being said, I am also glad that I had the rest of my classmates working alongside me though, because there was always someone to keep me company, or someone with a new perspective to bounce ideas off of, or someone to confirm that the long end of the LED was indeed positive.
Overall, I would definitely repeat my choice of working alone, but I would have gone to others for help (especially regarding the motor) sooner.

I enjoyed the late nights with you as both of us suffered. haha.
Even though the motor didn’t work out, I though the idea of having multiple buttons so kids actually need to sit and hold on to it to light the LEDs up was smart and how you can adjust it for kids with smaller hands was also a great way to be flexible with the design. One more thing, I simply like the aesthetics of the laser cutted wood!
Thank you so much for sacrificing your piece of acrylic!! I think your idea is really cool and would love to see it implemented, I think it is such an interesting way to get kids to sit down still. It was really interesting to see your project develop from the cute little paper box it started out from.